Showing posts with label VPLL 1912 Project. Show all posts

Wednesday, May 30, 2012

VPLL 1912 Skirt 0162 - L

E0162_SKIRTMy next pattern for the 1912 project will be this skirt.  I like the braid design in the front and the buttons.  This skirt is designed to be VERY high waisted.  The pattern has a 25 inch waist that very quickly spreads to about 32 inches.  Needless to say, those numbers don't match ME.  So time for more pattern alterations.  I took my measurements at waist and abdomen.  I need to add...O.K.  I just can't post it.  The number are just too awful.  I need to add a lot.  The skirt doesn't HAVE side seams. So I can't just add to the side seams.  Instead, there is a center panel with the closure on the left front side.  Then there is a back panel also cut on the fold with pleats added on the lower half.  Finally, there are side panels with darts at the hip.  So what to do.....

The center front panel is 10 inches.  I'm leaving that alone.

The center back panel is small.  I'm going to cut that on the selvedge rather than the fold, and added a center back seam.  I can add to the waist there AND I can make a zipper closure.  I may just want to make this skirt mid calf and wear it to work, or out and about and I don't want to deal with the hook and eye front closure.  So I add about 1/3 of what I need in total at the center back.  (I add half that distance to the center back seam plus a seam allowance.  For instance, if I'm added two inches to the back, I will add 1 inch to the center back plus a 3/8 inch seam allowance.  The other nice thing about adding a seam here is that if I need to take it in a little, this will be a good spot to do it.

Side Patten Piece with Alterations
I'm adding the rest to the side panels.  But wait, I can't just add anywhere.  There are darts designed to provide a curve at the hip.  If I add randomly, then I'll have a hip curve in the wrong place, and no curve where it's needed.  ALSO, the hem circumference seems to be about 72 inches,  and I don't want it any fuller than that.  So here's what I do...   Let's just say I need to add 4 more inches.  I divide in half since I'm adding equally to each side.  Now each side panel needs 2 inches of width added at the top (but not all the way down to the hem), and I don't want to change the position of the dart.  I slash the pattern on either side of the dart, cutting down nearly to the hem. The I spread the slashes 1 inch each and tape them in place.  Now, when I cut my two side panels, they will each be two inches bigger, but the dart will be in the same place (relative to the whole pattern) and the hem will not be fuller.


I cut a muslin and sewed it together following the pattern instructions.  Easy!  And I like the look of the top stitching.  The muslin ended up being a little too big but I pinned that out of the center back seam.

Next I need to figure out how I want to make the decorative panels in the front.  I'm considering embroidery or stitching black soutache to a black satin ribbon in a pattern similar to the one that came with the skirt pattern.  I bought some black polyester gabardine for the final version.  Yeah, I pretty much hate polyester, but the price was quite compelling.  Especially on sale.


Braid Design for Front of Skirt:
I needed a way to get the design marked on the black ribbon.  I tried white carbon paper.  Rubs off too easily.  I considered frixon pen, but I still had no way to transfer the design without free-handing it.
I ended up making photocopies of the design and taping them together in a long strip.  (I made two strips, one for each side).  Then I sewed the strips to the ribbon following the center curve.  I'm sewing the soutache to the ribbon using the pattern on the paper and I will take the paper off when I'm done.  VERY carefully.  The design on the pattern isn't an exact repeat (so I did my best to make it match on the ribbon).  The soutache had to be hand sewn since I'm not good enough to do those tight curves on machine.  It took FOREVER.

Skirt Construction

Once the decorative ribbon was done, I could sew up the skirt.
There are lots of options for waist finishing.  I decided to fold over about an inch and a half at the top and  support it with  twill tape.  This needs to be determined before you do anything else since it may change how the darts are sewn (and in my case, where to start the zipper).

Pressing - There is a lot of this needed before sewing starts:

Fold and press seam allowances on center front front, clipping as needed.
Fold and press seam allowance on sides of center back down to beginning of the pleat.
Fold pleats on center back per pattern marking and press into place.

1-  Sew up center back to base of zipper, install zipper - I left 1.5 inches at the top for waist fold AND I also added a tab for a button at the top.  Hook and eye is a valid option, but I wanted to try the tab.

3-  With sides and backs right side together, match the pleat seams and sew.  Sew across the top of the pleat as much as possible.  Clip as needed. (no picture)


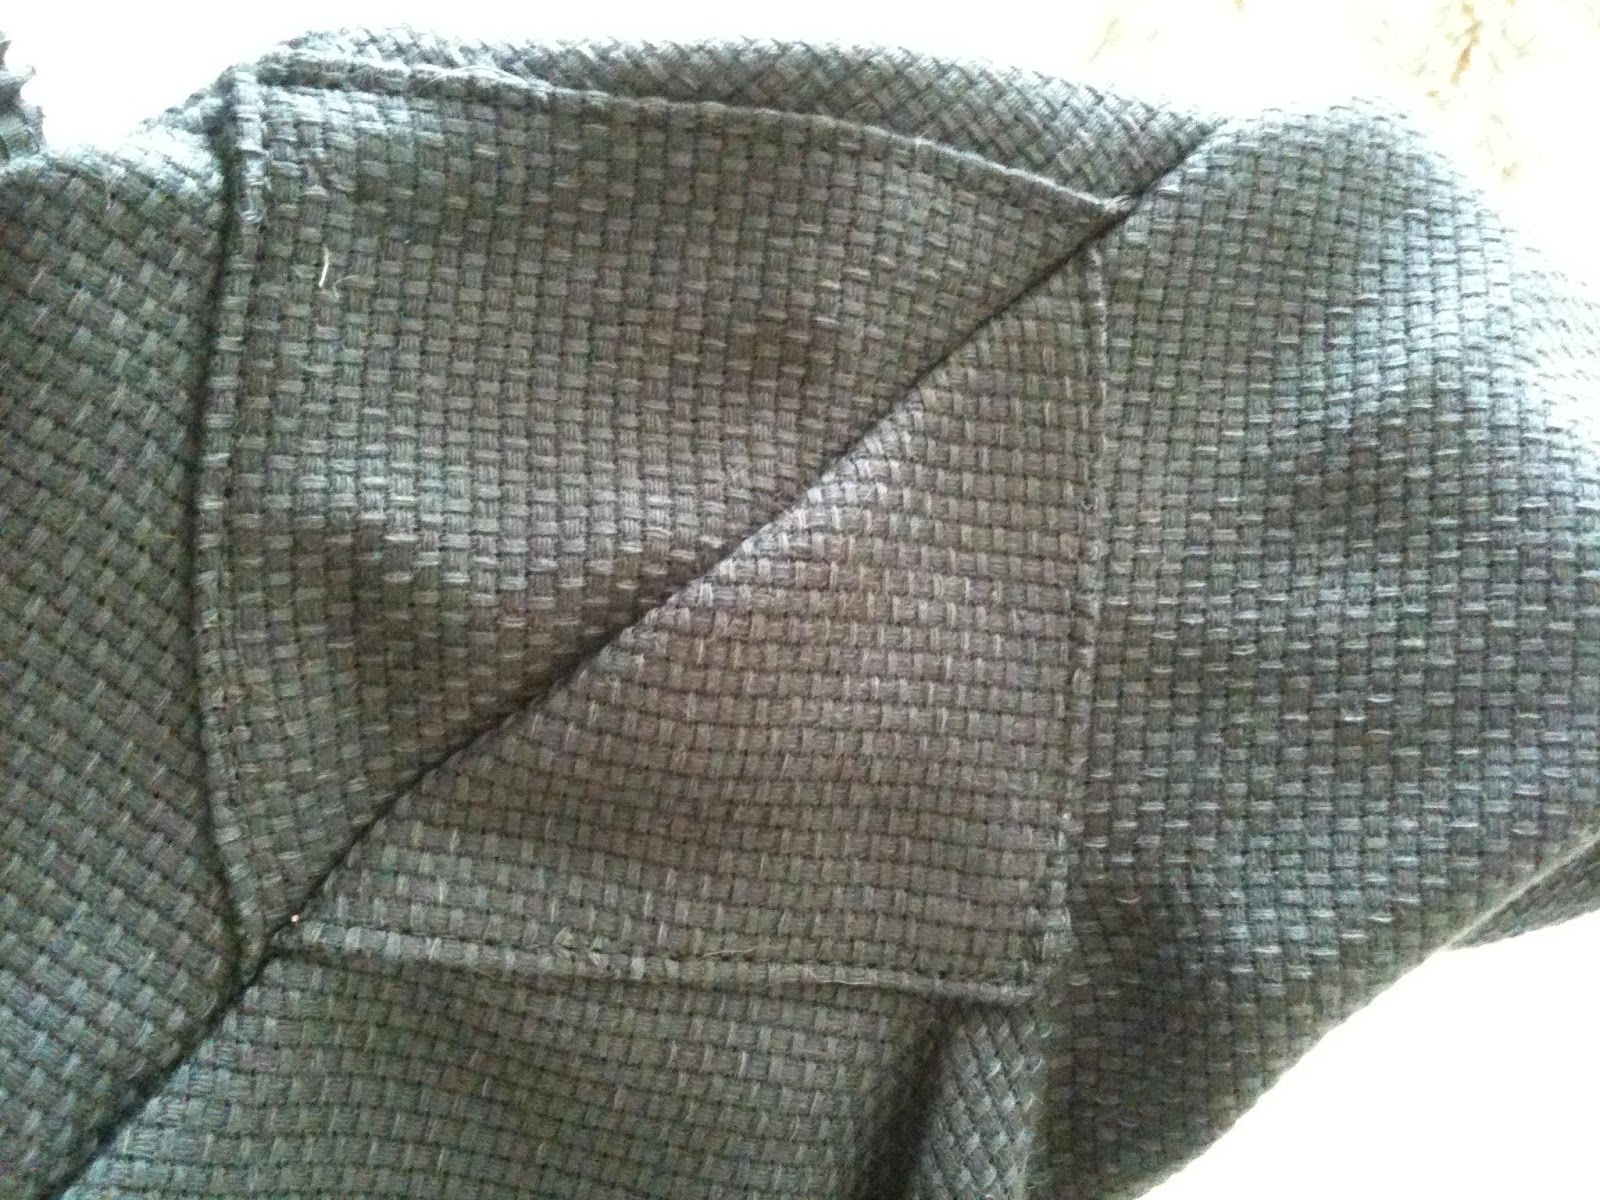
4-  Pin the top of the center back sides over the side panels.  Clip and ease as needed.  Top stitch very close to the fold.  Top stitch again 1/4 inch in from the first seam.  Remember directionality!  To get smooth parallel lines run both seams the same direction (start both at the top).  
(zipper, tab, top stitched seams shown in photo)


5-  Sew hip dart.  Remember to account for the fold over waistband when sewing the top of the dart.  The top 1.5 inches of the dart should mirror the NEXT 1.5 inches.  That way the waistband folds over smoothly. Alternately, start the dart AT the location of the finished waistband.  The dart markings on the pattern are intended to start at the finished waist.

6-  Pin the center front over the top of the side panels.  Pin the ribbon under the center front at the top of the narrow section.  Top stitch the center front in place.

7-  Top stitch ribbon on place.  (I did this last to make sure that the ribbon was flush against the top stitching).


twill tape basted in place, ready to fold raw edge
8- Fold over waist band and press.  Pin twill tape and sew raw edge at top over twill tape band.  Then fold over again and top stitch the waist.

insde of waist - folded over & stitched


9-  Add decorative buttons per the accompanying picture and hem.  (photo shows top stitching in front, a hint of the waist top stitching, plus my fancy plastic buttons!)


And I'm done!  I love it.  I will actually wear this.  The seam-less sides drape really nicely.  Very flattering.  I also highly recommend the zipper.  Without a corset, it would be nearly impossible to get a side front closure to lay nicely.  In fact, I will wear this with my Spring Mantle to tea!  I wish I could get better pictures.  Black on black is a &^%$# to photograph.


Pattern review:


VPLL Checklist
1.         Pattern Name - Skirt 0162
2.        Sewer’s Skill Level: Advance, Intermediate, Beginner - I feel like I've improved to intermediate
3.        Pattern Rating: 1-Not a Fan, 2 – So-So, 3 – Good/Average, 4-Better than Average, 5-I LOVED IT! and why?
        5 - I loved it.  There are any number of ways to style this simple skirt to make it perfect for any person and any occasion.  I loved the chance to play with the soutache trim, and the rest of the pattern is fairly simple
4.        What skill level would someone need to sew this pattern and why? - I think this is intermediate, only because the braid design is challenging, and without a waistband the finishing requires a deft touch.  I didn't do the side front closure, but that is definitely NOT beginner work. The bulk of the sewing is fairly simple, but it requires precision, confidence and experience to do it right.
5.        Were the instructions easy to follow? If not, what needs to be changed?  Instructions were easy.  I chose not to follow them.  I think adding a zipper, or the option of a zipper would really be helpful.  The front closure is likely to pull apart unless the wearing is corseted.  I listed the steps I took for construction, along with details on my braid.
6.        How was the fit/sizing?  Did it correspond to what you thought?  Exactly as expected/shown.
7.        Did you make any pattern alterations? If so, what alterations did you make? Where they fit or design alterations?   I made both.  I needed to make it larger, and I didn't want to increase the width at the hem.  Detailed in post.  I chose to put the braid design on a ribbon and attach it after top stitching.  And I changed the closure to a center back zipper with a button tab closure at the top.


Wednesday, May 23, 2012

Sewing Eclipse -

What a long day it was!  We started strong and knocked down a few quick things.  We fit the muslin for the 1912 project skirt.  Quick and easy.  We made decisions on buttons and button placement on the frock coat Lisa is making for her SO.  We looked at fabrics for Dickens era day dresses and talked trims.  Some decisions were made.  We reviewed design ideas for a multi-layered petticoat attached to a single yoke (provides volume without adding bulk at the waist).

And then we got back to work on our corsets.  The goal was to baste on a lacing strip and do final fittings.  First problem...Robin forgot the lacing strip.  She gets a pass since she is handicapped for the moment and must rely on her SO to load the car, so sometimes things get left out.  We made one ourselves from some stray canvas and grommets.  The scrapped together lacing strip did tough duty all day long.  The corsets were too big.  We had already done modifications and the result was that both of our corsets were too 'tall' at the center back.  We had to trim that part.  Robin chose to take hers in at the side seam.  She talked Lisa into it too.  Lisa probably should have cut from the center back AND taking in the side seams, but....whatever....  They're done, trimmed and grommeted.  Time to start binding.

Our best break was a brief stop to watch the eclipse.  My SO got the image refracted onto a dark surface.  Yup, the sun's corona blasting around the shadow of the moon.


We;re gonna try something new.  We are going to post each garment and update that post when we make changes.  Then we'll post a collective update as needed.

The updates on the corset are under the post Elizabethan Corset
(we were just so tired of them...seriously sick of looking at them, lacing them, re-stitching them)

Frock Coat will be up soon under WWND

Dickens yoked petticoat us at Sally Petticoat

VPLL 1912 Skirt posted shortly under that title


After a day in a house with cats, Rob finally succumbs to allergy tears

Friday, May 11, 2012

VPLL 1912 0189 Mantle - Part 2 - L


 Picking up where I left off...(see my previous post on this), I'm ready to add the trim to the shell.  The pattern suggests 10 yards of 2 3/4 inch bias strips.  I cut 7 but got impatient and decided to sew some on before I cut the rest.  I'm sure I'll be kicking myself later when I'm nearly done and I have to go cut and gather more bias strips.

The pattern doesn't specifically call for any lining, much less bag lining.  Others have done it though, and I love how it looks so I'm going to pile on the bag lining band wagon.  I cut the strips and sewed them together (opted out of continuous strip bias as it takes me longer to do that).  Then I gather stitched them, only stitching one 30 inch strip at a time.  This way the gather lines don't break or tangle. Then I start gathering (and gathering and gathering).

After the trim strips were gathered I  pinned the gathered strip to the shell, right sides together along the top of the trim line.   I want to stitch exactly 2 3/8 inches from the edge of the shell.  This way, when I fold the trim over, the bottom edge of the trim will be even with the bottom edge of the shell and I will have a 3/8 seam allowance along with a two inch trim.
  Then I pull the lining over the shell, right sides together, and pin all three layers together.  The gathered trim is sandwiched between the shell and the lining.   Please note, I have opted to NOT add any padding in the trim.  Personal preference.  I also chose to ignore the instructions to create a tube out of the trim and then sew it down.  The instructions call for 10 yards of trim.  I used 14.
Here's a finished sleeve waiting to be pressed.  I'm trimming each sleeve and sewing in the lining.  Once I've turned and pressed them, I can sew up the center back seam of the shell.  I will also sew the top and bottom 3 inches of the center back of the lining.  This leaves a nice gap for reversing the garment inside out to do the edge trim.  


But before I do start closing the center back, I have a brainiac idea!  I want to add a welt pocket.  


I was far too excited to measure or stitch carefully.  I know my seam lines are not straight.  But they're mostly straight and I can fudge a little with a hot iron.  Once I make the two welts with the red, I'll have a pocket bag with red on the shell side and polka dots on the lining side.  See how cute?


Once I got all the trim on I hand tacked it to the trim seam allowance.  That way my trim won't have a tendency to roll out or sag,  This pattern seems simple, but bias trim sewn to a bias cut edge is tricky work,  I had to fight the tendency of the edges to stretch while I pinned and sewed.  Even with stay stitching.

Here is the final garment (ignore the white string hanging off my elbow!  I was working on a different muslin while we took these pictures) And a celebratory glass of wine!


Pattern Review Checklist:
  1.  Pattern Description - Ladies Spring Mantle, 0189
  2.  Pattern Sizing - Based on pattern measurements, seems true to size
  3.  Did it look like the photo/drawing on the pattern envelope once you were done sewing  it? YES!
  4. Were the instructions easy to follow?  Recommend pictures for the gusset, and I found the trim 'tube' confusing
  5. What did you particularly like or dislike about the pattern?  I love the versatility of this pattern
  6. Fabric Used - Shell is hopsack linen, lining and pocket are cotton
  7. Pattern alterations or any design changes you made: I added a bust dart when I sized up the pattern, and  a small dart at the neck.  I also added a welt pocket in the lining.
  8. Would you recommend this pattern to others?  Absolutely
  9. Conclusion - I think I'll make this pattern again.
VPLL Checklist
  1.  Pattern Name - Ladies Spring Mantle, 0189
  2. Sewer’s Skill Level: Advance, Intermediate, Beginner - 'advanced' beginner
  3. Pattern Rating: 1-Not a Fan, 2 – So-So, 3 – Good/Average, 4-Better than Average, 5-I LOVED IT! and why?  I rate this a '5' since it is versatile and fairly easy given patience, and willingness to be detailed.
  4. What skill level would someone need to sew this pattern and why?  Bias trim sewn to a bias edge makes this pattern a bit too difficult for a beginner who is not accustomed to the potential for stretch.
  5. Were the instructions easy to follow? If not, what needs to be changed? I would add pictures to the gusset instructions, and clarify the 'trim tube'.  Also, I'd recommend stay stitching in the instructions.
  6. How was the fit/sizing?  Did it correspond to what you thought?  I made major size changes so N.A.
  7. Did you make any pattern alterations? If so, what alterations did you make? Where they fit or design alterations?  As above, I made major size alterations.  I also added a darts for the larger size, and a welt pocket because I thought it would be cute.
  8. Other notes:  I made photo and written notes of all my changes in the two blog posts.  


Wednesday, May 2, 2012

VPLL 1912 Mantle, 0189 - L


 (this post will be a compilation of many posts on this project)
Next up on the VPLL 1912 project is the Spring Mantle.
It's a straight forward build with a lot of fussy work pleating the trim around the edges.  I chose it because I think it would make a cute casual jacket for everyday using modern fabric.  The challenge for me will be making the pattern fit my body while maintaining the proportions.  I did a quick set of measurements from the actual pattern and compared them to my measurements (which don't include wearing ease):

Bust    37.5          Me    47.5
Hip     39.5          Me     43
Back   16.5          Me    16
Upper arm  15      Me    15


So I'm a lot wider than the pattern (no surprise there!) except across the back.  I could only estimate the width from the edge of the gusset though and I will want some ease so I'll add there, but only a little.  Most of the add will be in the bust and hips.  I'll add the bust volume in front but have to spread the hip add around the bottom.  I need to do this without making the waist too baggy.  And I think the solution will be to add darts under the arm where they won't interfere with the kimono sleeve.  The only darts in the pattern are two small darts at bust height in the center front (under the trim).  I'll keep those too.

Sleeve length from neck is 23 inches.  That takes the sleeve to 4 inches above my wrist bone.  I want to add about an inch there but will wait until I have a muslin that fits my torso in case the FBA changes the sleeve length a bit (it shouldn't but, yeah...)
The angle where the sleeve meets the body of the jacket is different in front and back.  I'm curious how that will hang.  I will make sure and maintain the angles in the muslin.

The body of the jacket is nearly the same length as the sleeve and looks to hit my upper hip.  I would like it longer, but will wait until I've done the FBA and hip adjustments to figure out how much.  This pattern is just a single piece cut for right and left with a seam in center back and under the arms.  There is an underarm gusset for ease.  It will be a BIG challenge to modify without turning it into a big baggy mess.  I may have to add underbust darts too just to keep some shape.

For fabric, I picked a pewter linen hopsack fabric that promises to ravel like crazy.  The lining will be an ivory with embroidered black spots (textural).  The trim will be a soft black lightweight cotton.  I think it will look good with a slacks or a skirt and still be perfect with jeans.

Part Two - THE FBA and associated modifications

I've done full bust adjustments before, but never actually followed the really cool process that you can find on the internet.  And NEVER with a kimono sleeve before.  After reading Leila's fantastic post on the subject, I decided I would give it a try.  I took a lot of camera pictures to demonstrate my process.
Are you ready?

The original pattern piece.  Yes, I already cut it up, but I've shoved it back together neatly.

Per Leila, if the sleeve is removed, a routine FBA can be performed.  I held the pattern piece up to my body and determined that the center front was 3 inches from MY center front.  So I need to add that to the pattern.


.

Here is the sleeve, cut off.  The red arrow is the width of my shoulder (a logical determination of where the sleeve should start).  I used the slash line for the gusset as an under arm indicator and just drew an approximate armscye on the paper.
In addition, I've marked my bust point on the pattern.


I cut straight up from the bottom of the pattern to my bust point.
The grainline marked on the pattern was a great guide.

Then I measured about 1/3 up from the underarm (per Leila) and cut from the bust point to that spot.  BUT not through.  I will need that to stay connected!
Then I separate the pattern by 3 inches at the bust point.  (Remember - I needed to add 3 inches!).  I know it looks crazy, but breasts have volume.  You need to add width and length.  This actually will take the bust point out, not the down that it appears.


If I had a dart, I would cut from the center of the dart into the bust point (BUT not through!).  In this case I don't.  As I mentioned above, with a larger chest I think I need to add one.  So I just picked a logical location and cut in to the bust point.  Again, it needs to stay attached!  The I pivot the lower side to be parallel to the center front.  I made a red line where I pivoted and then another to show where the pattern needs to be parallel.  You don't need to worry about the distance between the parallel lines, just that they are parallel.


 Now you may have noticed that the center front portion is shorter than the side front portion.  Simply cut straight across that center front leg of the pattern (perpendicular to the grainline) and bring the lower part down to match at the front hemline.  It's hard to see here because the front is curved.  There's a red line to show the location of my cut.

That's it.  Done.  All that's left is to put some tissue or paper into the gaping open spaces.  Then you have a new pattern piece that should fit you.  I am so awesomely confident!  I haven't cut my muslin yet!


 Here it is with some striped tissue paper glued in.  Just for contrast.  I also messed around with altering the angle of the curve down the front.  My current plan is to cut the top of the curve 'as is' and leave extra fabric at the bottom of the curve.  That would let me alter the 'V' impression in the front and have less of a gap in the lower front.  Not a part of me I plan to emphasize.

Next up, re-attaching the sleeves.  Urg.  Sleeves are my nemesis.


Here is the main pattern piece.  I have moved the sleeve back into the general vicinity of where it came from.  Hmmm.  No match.  Please note the perplexed look on the sleeve's face.

By adding volume with a bust dart, I've curved the armscye too much for a kimono sleeve (IMHO).  Next plan (thanks Robin) is to shift the bust dart to a french dart.  That should help.  Also, instead of worrying about making the sleeve piece fit back in, I'm going to recreate the underarm angles I saw in the original pattern.  I can use the lower half of the sleeve piece to preserve the arm trim placement which is cute.  I need to make sure I make the sleeve length appropriate for me, and for the look of the pattern.


Out comes the scissors and tape, and its time for dart changes...AGAIN.

I slashed the pattern two inches lower than my first dart, taped closed that first dart, and added tissue for the new one.  The new dart starts about an inch above my waist even though it doesn't look like it.  I also added about an inch in the length in front (I held it up and determined the front was too short, relative to the back).

I taped in the sleeve and made a muslin.  Sleeves were too tight.  I cut the pattern from neck to wrist down the shoulder line, and added about an inch.  Then I cut another muslin.

Was I tired of it yet?  Oh, yes!  I always struggle at this point.  It's so easy to just saw 'good enough' and start cutting my fabric.  But there is no point in making something that doesn't fit, or fits so badly that I'll never wear it (recall that I want to do a modern take on this pattern).


Here is the final muslin, front and back:


 I'm pretty happy with this.  I'm wearing a tank top AND a light weight cardigan under the muslin to make sure that it will actually function as a jacket (worn over a blouse or other top).  For the record, it's very difficult to take a picture of your own back in a mirror with a phone camera.  I held it pointing over my shoulder and 'hoped'.  Its tough to see, but I also pinned out a bit of the flair at the lower back.  I just didn't like it.  Next I cut my fabric.  I'll post a picture of the final muslin that I'm using for a pattern as a comparison to the original pattern piece.

Here is the final pattern piece laid out to cut, with the original pattern picture next to it.
The red circles highlight the only structural changes I made.


The large circle shows the dart I added as part of my FBA and the small circle shows another tiny dart that took up some volume in the neck area (the muslin just wasn't laying flat).  Separately, I added a bit the the center front lower curve in case I want a little more belly coverage.  If I don't like it, I can trim it off before I add the trim. Here's what it looks like after I leave the room for a moment.  Looks my 4 legged helper had a slide...
The gussets...  I finally read the instructions AND other participants posts.  I get it.  I was confused because the gusset is CUT as a square.  But SEWN as a triangle.  I simply slashed the fabric and top-stitched two sides of the square over the slash.  Did that on each side of the arm and then sewed right up the middle of the gusset fabric.  Trim the extra fabric once you're done!  I really think some simple illustrations would help the pattern instructions.  Forgive my crooked stitch lines.  Those embroidered dots are thick and sometimes would knock me off course.  I'm happy this is the lining.  See!  The shell was more even!


I've decided to bag line the whole thing so I'm going to attach the top line of the trim to the shell, and then wrap the bottom of the trim into the seam as I sew on the lining.  First I have to make the trim.  About 10 yards of bias trim.  Tedious!  Then gather the long sides top and bottom.  More tedious!  You just can't gather more than about a yard at a time without risking knots and tangles and failure.  Once I'd made about half the trim I gathered it and attached some to the cuff.  Step by step next, but I wanted to show the result.  (I'm very happy with this). AND I'm having 1,001 problems adding to this post.  I'm going to start a new one taking up where this one left off.  Clearly the interwebs are telling me this post is too long.  See you again in a moment!

Tuesday, May 1, 2012

Group 22 of 1912 Project High Tea - Lisa

Robin hosted a lovely high tea for the ladies in Group 22 of the VPLL 1912 project.  This was the first time that we had all met in person rather than online. It was to have been co-hosted by both of us but I was waylaid by the real world (work travel).

This was done though she is still quite heavily casted for her broken foot. The tea was perfectly lovely.  There were tea sandwiches, scones, fruit tartlets, lemon curd, and even Devon cream, and, of course, tea (Fortnum and Mason Assam Superb, Irish Breakfast and Earl Grey).  After tea had been consumed, there was also champagne.

The instigator of the project, Janyce Hill, brought some of the source material for the project.  There were actual squeals of delight.  The illustrations were simply delightful.  In addition, there is nothing quite as wonderful as the conversation among a group of like minded people.

I now make profound apologies for being impatient (yet again) and taking pictures without letting Robin set her camera for the intermittent shadows.  I don't care if my face shows up and yet, I've opted against including any pictures of myself in this post.  My dress is already well documented here and I absolutely loathe how I looks in it. (Totally unfair, as I loathe my dress just as much, if not more, than she does.  I think Lisa was taking advantage of the fact that I can't run away right now!)


Here is the group, minus Lisa and Linda, who was not in costume.  Pam (right) is wearing a blouse and skirt created from patterns from the VPLL 1912 project.  Janyce is to the left, and Robin is hanging on to Pam for dear life.


Subjects that we covered:
History of the project
Upcoming patterns
Sewing techniques (and sharing them)
Challenges in updating and modifying patterns
Fabric
Costumers Guild
Costumes from other eras
How much we all love doing this.


Separate from all the tea and fun, there was a little sewing done too. (There was no sewing done on my front as my "sewing workroom", which is the dining room, had to be cleaned up for the party and I spent all my time polishing silver and washing china - R)
I need to finish my renaissance corset in order to even THINK about cutting out a bodice, or making the waistbands for the skirt and underthings.  I also need the neckline in place so I can finish my chemise (sort of made a mistake cutting the neck opening...maybe).
I've got everything done that I can.  Now I need another fitting to determine where to put the center back lacing grommets and boning.  All those boning channels are incredibly tedious to sew.

Monday, February 6, 2012

1912 Blouse for Dummies - VPLL 1912 Project

Our first pattern - Blouse EO191.  We made this to the pattern size since neither of us thought we would wear it as it wouldn't be flattering.  We made it up in white muslin, with the trim pieces in beige dotted cotton that we had laying about.  We wanted to make it fully lined and with most of the finishing (everything but back buttons).  We were not able to do any fittings during construction.  Apparently we are giants, and our smallest dress form was perfect except its neck which is HUGE.  The lack of arms was a problem too...
We are re-learning sewing after modest experience in our youth.  We opted to try to follow the instructions as written and write about how it worked for us.  Some of the instructions confused us, but we expected that.  Some of the choices we just didn't like and would do differently if we were making it for us.

Trim
Sleeve trim - sewing the bottom of the trim to the sleeve with a small turned-under hem would not be our choice although it may be the easiest choice with the curved hem.  We thought self-facing would look a lot nicer.  There are no instructions for attaching the top of the trim piece so we top stitched it to the sleeve.  Depending on the fabric used, there are doubtless better ways to do that too.
Neck trim - We chose to double the fabric because our fabric was very thin.  We needed the extra body, especially with the beads.  It didn't meet in the back, even though we took slightly larger pleats in the front of both the blouse and the lining.  This may be because of placement.  We aren't really sure.  Others didn't seem to have this problem.  It didn't lay flat on the shoulders once we put it on the blouse.  The blouse itself lay smooth on the dress form and the lining matched well.  Again, it could be placement, and solved by moving the trim higher up the neck.  We couldn't test that due to the dress form limitations (linebacker neck) and my unwillingness to make my 10 year old son cross-dress for this project.   And then the binding, the binding that  kicked out butts.  This is very obvious at the point in the front.  It's not symmetrical top and bottom.  We know what we did wrong.  We chose not to fix it and call it an awesome learning experience.  Here it is without the blouse.


Sleeves
They seem to stand out from the body and cant forward.  We assume this is period styling.  They went in easily using the pattern markings, although we had no ease (even though the pattern suggested we would).  When we sewing in the lining, we sewed it right under the binding added at the shoulder.
Blouse body and lining

We re-folded the pleats out of personal preference.  We took about an inch of additional volume out of the top.  We sewed the binding strips to the shoulders before we we sewed the side seams which was easier but not nearly as tidy looking after we sewed the side seams.
The lining had us stumped at first.  We started by lining it up at the neck and it just didn't fit.  It was far too small.  We un-pinned it and started over at the arm scythe and everything matched right up.  Thing is, we ended up having to trim quite a bit of fabric from the lining at the neck opening which made it too big.  We added a couple of pleats on the inside and it looks nice.

Too Large

Too Small


From the inside

We didn't like the blouse bottom finish in the front.  We thought a narrow binding strip over the gathers would look a lot better.
Finally, we really liked the little basque in the back.  We thought it would look a bit silly, but really ended up liking it.

Not Surprising -
The drawing of the blouse is much longer and leaner than the actual garment.


This took us 7 hours from cutting to final press and pictures.
One adult beverage (each)
About a '4' on the profanity scale (primarily due to the $*#&$ binding).
We planned to finish this in a day but we were pleasantly surprised when we actually succeeded.