Wednesday, May 16, 2012

The Elizabethan Corset - R


After spending an entire sewing session fitting our corset muslins, we cut them out and sewed them together.  I finally received my flat steel boning and could check the channels and rough cut them. Lisa is using the same fabric, but plastic boning she got on sale.  Here's my corset with a linen front and a coutil back with the bones rough cut and shaped on one end. I'll cut and shape about 6 more for the back, even though, until we have our fittings again this Sunday, I won't know how many I'll really need.  I must dip the ends in paint to seal them.  I hand filed the ends because the Dremmel was in the garage and the garage is not a friendly place to a person on crutches! Now my hands are sore.

Come Sewing Sunday, both of us have our basic corset with boning in the front and sides.  The PLAN is to baste on a lacing strip and do a final fitting.  Except the lacing strip has gone missing again.  So we make our own from some stray canvas and grommets.  Then we fit, and fit and fit. ( It didn't help that we had slightly uneven grommet placements on our fitting lacing tape - R) The first picture of Rob's fitting was lost, but here is the second....and it is obvious that we don't have an even 2 to 4 inch gap down the center of the back.  (the first go had the top two grommets meeting at the center).  So Robin had to go in and make a curve out where her ribs are more robust than most!  Guess that's what comes of going corset-less for most of your life!  After that adjustment, we got it pretty darned correct.  By the time we were finished fitting, our combined patience had worn thin and I actually yelled Lisa's pat phrase of "It's only UNDERWEAR!" - R

And now it's time for grommets.  I (Lisa) had never done this before so Robin made me do all my own marking and measuring.  Also I got to do my own hole-spreading and hammering.  And that sits well with my Viking heritage!

Here is my marked line with the grommets already in.  I guess it's hard to see the marking for actual grommet placement.  Sorry!  And here I am, carefully creating holes with an awl (reduces broken threads in the fabric for a stronger garment) and hammering in my grommets.  I'm always happy to hammer something! Look at her pretty grommets. Yeah, I make her do her own yet I'm the one who ends up putting one in backwards!  Sheesh! - R


We've already stitched up the bottom edge of our boning channels so the lower part of the corset is done except for binding.  We still need to fiddle with the strap placement.  It's just not right.
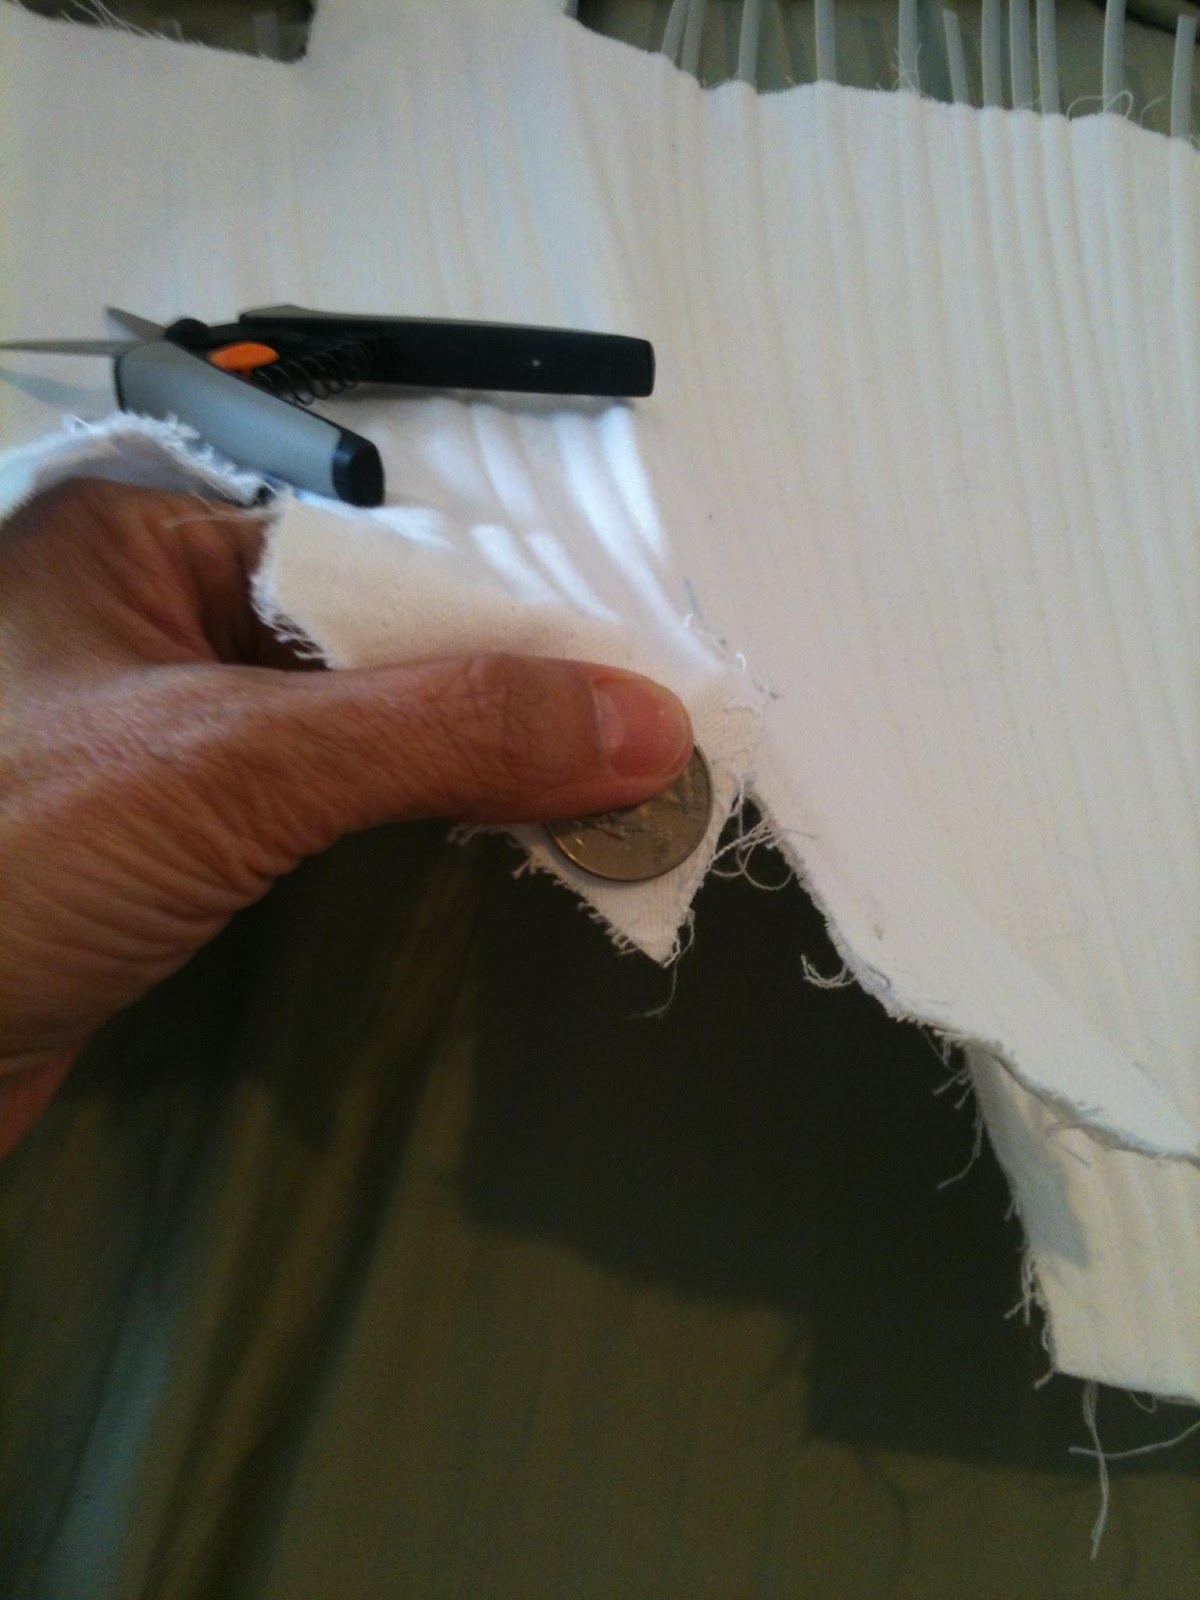
But, being impatient I have started binding the bottom edge.  And the first step is to round the corners of the tabs.  The instructions suggest using a quarter to mark the curve.  Works perfect.  


And then, simply sew on the binding.  HA HA HA HA


There is very little simple about sewing on binding around curves. Here is an 'outside' curve where it is important to spread ease over the whole inside edge of the curve.  Those bumps will go away with pressing (which I can't do because I got taco on my corset  : O ) (And Rob just HAS to chime in with "WHY are you working in white with taco sauce anywhere near it????!!!  But your stitching looks fab.  To which I reply - it was dinner time!  )


We've finished binding the back and bottom of the corsets.  Next it's time for a wash and a final check to make sure the top hits at the right spot.  Robin re-set my back straps.  I have a full bust but narrow shoulders.  Always a fitting challenge.
Here is a close up of the back, washed and ready for bones.  In fact I've got the bones in, trimmed, filed and the top sewn shut.  Ready for the final binding.  I'm taking it on vacation with my for hand sewing.  I like how it looks.

I don't plan to send updates from my secret Southern California vacation spot (he he).  But ya never know.....
(OK, OK, I might be the chubby lady under the umbrella, by the pool, sewing)


I've joined the ranks of "those who get "stuff" on their projects. I KNOW how the blood got on the bias trim, but what IS that orange stuff that looks like Cheez-it orange? I have no idea.  Really. I was going to wait for my strap fitting to finish the binding, but decided to bind as much of the corset top as I could, leaving room to position the straps.  We'll be doing a strap fitting for me plus a measurement for the Ren bodice pattern. I had measured Lisa in her corset and chemise and she says that the measurements didn't really help her for the bodice, so she just cut a muslin with extra fitting room. Maybe I'll end up doing the same, but part of me feels that measurement must be good for SOMETHING, right?

Addendum:  That wasn't blood on the corset.  The culprit has been found out.  It is residue from my lightly tinted lip balm going from pin-in-mouth to pin-in-corset, leaving a dot of pink at each pierce point. ARGGGGHHHH! Almost finished with the had stitching of the bias tape and sewing through coutil is a be-atch. Glad it will be over soon.
 

"I Shall Make You a Cambric Shirt..." Men's Elizabethan Gentleman's Shirt - R

Collar and gussets.  Can I tell you I don't like making gussets?  Does anyone?

Right side of one side of gusset
While laid up with a broken foot, Lisa has encouraged me to sew like crazy, so I tackled my SO's shirt.  I'd previously done the machine embroidered black work. I put this together in a week.  It included a lot of hand sewing because of the gussets and all the finishing.

I'm pleased with the work and it look great on him. AND I'm getting better with gussets. This pattern is from Margo Anderson's Elizabethan Gentleman's Wardrobe http://margospatterns.com/and I'll be making him an entire outfit.

The one thing I figured out AFTER I'd finished was how to French seam a gusset, so I'll have to try that out on my chemise.  What I ended up doing, in my ignorance, was turning under every seam twice by machine, then hand stitching the gusset to the seams.  It works, serves the purpose, but is not elegant.

I don't know about you, but sometimes my markings don't come out of my item.  This time,
All of the did, so I'm happy with that.  Now that his shirt is finished, I can fit the doublet, the next on my "to do" list for him.
The back of the gusset hand basted and sewn in.

I love my ruffly cuffs.

Here's a close up of the embroidery.  Yes, I'm kind of proud!

Friday, May 11, 2012

VPLL 1912 0189 Mantle - Part 2 - L


 Picking up where I left off...(see my previous post on this), I'm ready to add the trim to the shell.  The pattern suggests 10 yards of 2 3/4 inch bias strips.  I cut 7 but got impatient and decided to sew some on before I cut the rest.  I'm sure I'll be kicking myself later when I'm nearly done and I have to go cut and gather more bias strips.

The pattern doesn't specifically call for any lining, much less bag lining.  Others have done it though, and I love how it looks so I'm going to pile on the bag lining band wagon.  I cut the strips and sewed them together (opted out of continuous strip bias as it takes me longer to do that).  Then I gather stitched them, only stitching one 30 inch strip at a time.  This way the gather lines don't break or tangle. Then I start gathering (and gathering and gathering).

After the trim strips were gathered I  pinned the gathered strip to the shell, right sides together along the top of the trim line.   I want to stitch exactly 2 3/8 inches from the edge of the shell.  This way, when I fold the trim over, the bottom edge of the trim will be even with the bottom edge of the shell and I will have a 3/8 seam allowance along with a two inch trim.
  Then I pull the lining over the shell, right sides together, and pin all three layers together.  The gathered trim is sandwiched between the shell and the lining.   Please note, I have opted to NOT add any padding in the trim.  Personal preference.  I also chose to ignore the instructions to create a tube out of the trim and then sew it down.  The instructions call for 10 yards of trim.  I used 14.
Here's a finished sleeve waiting to be pressed.  I'm trimming each sleeve and sewing in the lining.  Once I've turned and pressed them, I can sew up the center back seam of the shell.  I will also sew the top and bottom 3 inches of the center back of the lining.  This leaves a nice gap for reversing the garment inside out to do the edge trim.  


But before I do start closing the center back, I have a brainiac idea!  I want to add a welt pocket.  


I was far too excited to measure or stitch carefully.  I know my seam lines are not straight.  But they're mostly straight and I can fudge a little with a hot iron.  Once I make the two welts with the red, I'll have a pocket bag with red on the shell side and polka dots on the lining side.  See how cute?


Once I got all the trim on I hand tacked it to the trim seam allowance.  That way my trim won't have a tendency to roll out or sag,  This pattern seems simple, but bias trim sewn to a bias cut edge is tricky work,  I had to fight the tendency of the edges to stretch while I pinned and sewed.  Even with stay stitching.

Here is the final garment (ignore the white string hanging off my elbow!  I was working on a different muslin while we took these pictures) And a celebratory glass of wine!


Pattern Review Checklist:
  1.  Pattern Description - Ladies Spring Mantle, 0189
  2.  Pattern Sizing - Based on pattern measurements, seems true to size
  3.  Did it look like the photo/drawing on the pattern envelope once you were done sewing  it? YES!
  4. Were the instructions easy to follow?  Recommend pictures for the gusset, and I found the trim 'tube' confusing
  5. What did you particularly like or dislike about the pattern?  I love the versatility of this pattern
  6. Fabric Used - Shell is hopsack linen, lining and pocket are cotton
  7. Pattern alterations or any design changes you made: I added a bust dart when I sized up the pattern, and  a small dart at the neck.  I also added a welt pocket in the lining.
  8. Would you recommend this pattern to others?  Absolutely
  9. Conclusion - I think I'll make this pattern again.
VPLL Checklist
  1.  Pattern Name - Ladies Spring Mantle, 0189
  2. Sewer’s Skill Level: Advance, Intermediate, Beginner - 'advanced' beginner
  3. Pattern Rating: 1-Not a Fan, 2 – So-So, 3 – Good/Average, 4-Better than Average, 5-I LOVED IT! and why?  I rate this a '5' since it is versatile and fairly easy given patience, and willingness to be detailed.
  4. What skill level would someone need to sew this pattern and why?  Bias trim sewn to a bias edge makes this pattern a bit too difficult for a beginner who is not accustomed to the potential for stretch.
  5. Were the instructions easy to follow? If not, what needs to be changed? I would add pictures to the gusset instructions, and clarify the 'trim tube'.  Also, I'd recommend stay stitching in the instructions.
  6. How was the fit/sizing?  Did it correspond to what you thought?  I made major size changes so N.A.
  7. Did you make any pattern alterations? If so, what alterations did you make? Where they fit or design alterations?  As above, I made major size alterations.  I also added a darts for the larger size, and a welt pocket because I thought it would be cute.
  8. Other notes:  I made photo and written notes of all my changes in the two blog posts.  


Wednesday, May 2, 2012

VPLL 1912 Mantle, 0189 - L


 (this post will be a compilation of many posts on this project)
Next up on the VPLL 1912 project is the Spring Mantle.
It's a straight forward build with a lot of fussy work pleating the trim around the edges.  I chose it because I think it would make a cute casual jacket for everyday using modern fabric.  The challenge for me will be making the pattern fit my body while maintaining the proportions.  I did a quick set of measurements from the actual pattern and compared them to my measurements (which don't include wearing ease):

Bust    37.5          Me    47.5
Hip     39.5          Me     43
Back   16.5          Me    16
Upper arm  15      Me    15


So I'm a lot wider than the pattern (no surprise there!) except across the back.  I could only estimate the width from the edge of the gusset though and I will want some ease so I'll add there, but only a little.  Most of the add will be in the bust and hips.  I'll add the bust volume in front but have to spread the hip add around the bottom.  I need to do this without making the waist too baggy.  And I think the solution will be to add darts under the arm where they won't interfere with the kimono sleeve.  The only darts in the pattern are two small darts at bust height in the center front (under the trim).  I'll keep those too.

Sleeve length from neck is 23 inches.  That takes the sleeve to 4 inches above my wrist bone.  I want to add about an inch there but will wait until I have a muslin that fits my torso in case the FBA changes the sleeve length a bit (it shouldn't but, yeah...)
The angle where the sleeve meets the body of the jacket is different in front and back.  I'm curious how that will hang.  I will make sure and maintain the angles in the muslin.

The body of the jacket is nearly the same length as the sleeve and looks to hit my upper hip.  I would like it longer, but will wait until I've done the FBA and hip adjustments to figure out how much.  This pattern is just a single piece cut for right and left with a seam in center back and under the arms.  There is an underarm gusset for ease.  It will be a BIG challenge to modify without turning it into a big baggy mess.  I may have to add underbust darts too just to keep some shape.

For fabric, I picked a pewter linen hopsack fabric that promises to ravel like crazy.  The lining will be an ivory with embroidered black spots (textural).  The trim will be a soft black lightweight cotton.  I think it will look good with a slacks or a skirt and still be perfect with jeans.

Part Two - THE FBA and associated modifications

I've done full bust adjustments before, but never actually followed the really cool process that you can find on the internet.  And NEVER with a kimono sleeve before.  After reading Leila's fantastic post on the subject, I decided I would give it a try.  I took a lot of camera pictures to demonstrate my process.
Are you ready?

The original pattern piece.  Yes, I already cut it up, but I've shoved it back together neatly.

Per Leila, if the sleeve is removed, a routine FBA can be performed.  I held the pattern piece up to my body and determined that the center front was 3 inches from MY center front.  So I need to add that to the pattern.


.

Here is the sleeve, cut off.  The red arrow is the width of my shoulder (a logical determination of where the sleeve should start).  I used the slash line for the gusset as an under arm indicator and just drew an approximate armscye on the paper.
In addition, I've marked my bust point on the pattern.


I cut straight up from the bottom of the pattern to my bust point.
The grainline marked on the pattern was a great guide.

Then I measured about 1/3 up from the underarm (per Leila) and cut from the bust point to that spot.  BUT not through.  I will need that to stay connected!
Then I separate the pattern by 3 inches at the bust point.  (Remember - I needed to add 3 inches!).  I know it looks crazy, but breasts have volume.  You need to add width and length.  This actually will take the bust point out, not the down that it appears.


If I had a dart, I would cut from the center of the dart into the bust point (BUT not through!).  In this case I don't.  As I mentioned above, with a larger chest I think I need to add one.  So I just picked a logical location and cut in to the bust point.  Again, it needs to stay attached!  The I pivot the lower side to be parallel to the center front.  I made a red line where I pivoted and then another to show where the pattern needs to be parallel.  You don't need to worry about the distance between the parallel lines, just that they are parallel.


 Now you may have noticed that the center front portion is shorter than the side front portion.  Simply cut straight across that center front leg of the pattern (perpendicular to the grainline) and bring the lower part down to match at the front hemline.  It's hard to see here because the front is curved.  There's a red line to show the location of my cut.

That's it.  Done.  All that's left is to put some tissue or paper into the gaping open spaces.  Then you have a new pattern piece that should fit you.  I am so awesomely confident!  I haven't cut my muslin yet!


 Here it is with some striped tissue paper glued in.  Just for contrast.  I also messed around with altering the angle of the curve down the front.  My current plan is to cut the top of the curve 'as is' and leave extra fabric at the bottom of the curve.  That would let me alter the 'V' impression in the front and have less of a gap in the lower front.  Not a part of me I plan to emphasize.

Next up, re-attaching the sleeves.  Urg.  Sleeves are my nemesis.


Here is the main pattern piece.  I have moved the sleeve back into the general vicinity of where it came from.  Hmmm.  No match.  Please note the perplexed look on the sleeve's face.

By adding volume with a bust dart, I've curved the armscye too much for a kimono sleeve (IMHO).  Next plan (thanks Robin) is to shift the bust dart to a french dart.  That should help.  Also, instead of worrying about making the sleeve piece fit back in, I'm going to recreate the underarm angles I saw in the original pattern.  I can use the lower half of the sleeve piece to preserve the arm trim placement which is cute.  I need to make sure I make the sleeve length appropriate for me, and for the look of the pattern.


Out comes the scissors and tape, and its time for dart changes...AGAIN.

I slashed the pattern two inches lower than my first dart, taped closed that first dart, and added tissue for the new one.  The new dart starts about an inch above my waist even though it doesn't look like it.  I also added about an inch in the length in front (I held it up and determined the front was too short, relative to the back).

I taped in the sleeve and made a muslin.  Sleeves were too tight.  I cut the pattern from neck to wrist down the shoulder line, and added about an inch.  Then I cut another muslin.

Was I tired of it yet?  Oh, yes!  I always struggle at this point.  It's so easy to just saw 'good enough' and start cutting my fabric.  But there is no point in making something that doesn't fit, or fits so badly that I'll never wear it (recall that I want to do a modern take on this pattern).


Here is the final muslin, front and back:


 I'm pretty happy with this.  I'm wearing a tank top AND a light weight cardigan under the muslin to make sure that it will actually function as a jacket (worn over a blouse or other top).  For the record, it's very difficult to take a picture of your own back in a mirror with a phone camera.  I held it pointing over my shoulder and 'hoped'.  Its tough to see, but I also pinned out a bit of the flair at the lower back.  I just didn't like it.  Next I cut my fabric.  I'll post a picture of the final muslin that I'm using for a pattern as a comparison to the original pattern piece.

Here is the final pattern piece laid out to cut, with the original pattern picture next to it.
The red circles highlight the only structural changes I made.


The large circle shows the dart I added as part of my FBA and the small circle shows another tiny dart that took up some volume in the neck area (the muslin just wasn't laying flat).  Separately, I added a bit the the center front lower curve in case I want a little more belly coverage.  If I don't like it, I can trim it off before I add the trim. Here's what it looks like after I leave the room for a moment.  Looks my 4 legged helper had a slide...
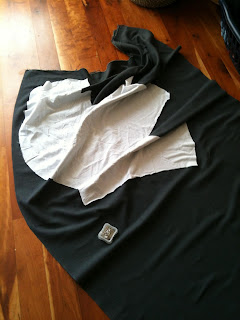
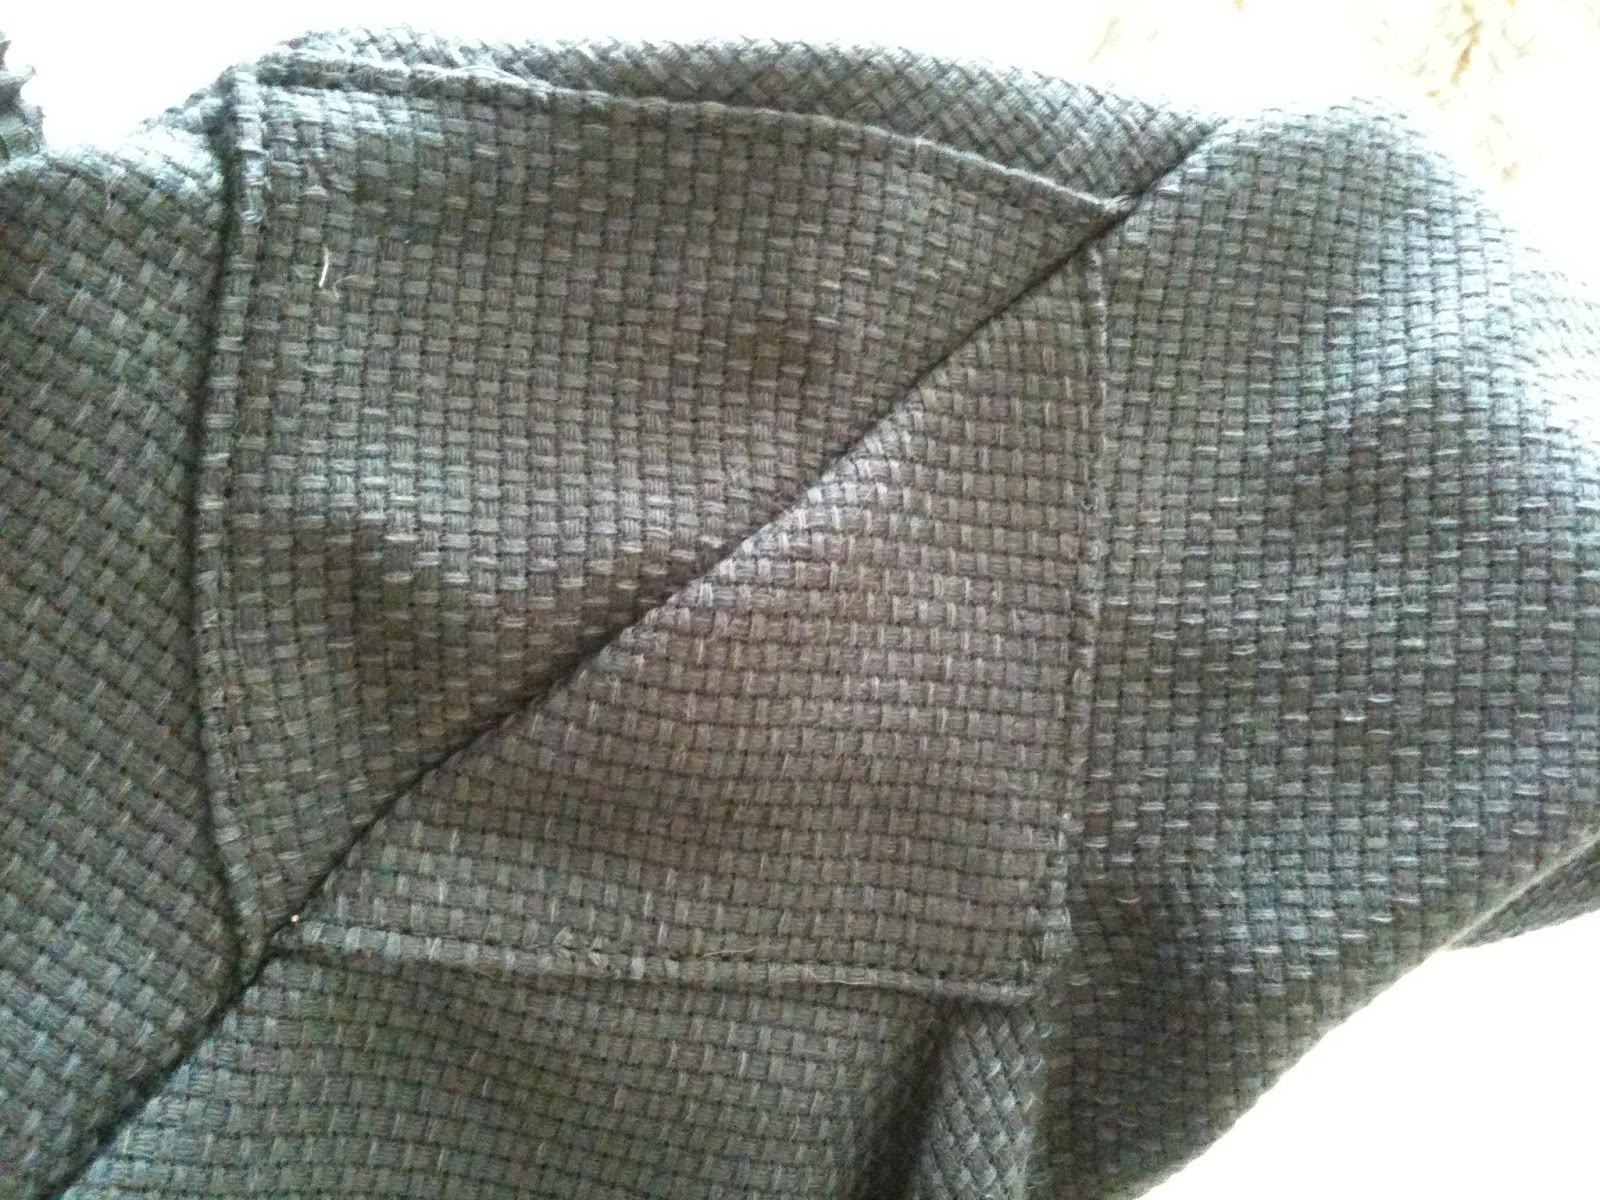
The gussets...  I finally read the instructions AND other participants posts.  I get it.  I was confused because the gusset is CUT as a square.  But SEWN as a triangle.  I simply slashed the fabric and top-stitched two sides of the square over the slash.  Did that on each side of the arm and then sewed right up the middle of the gusset fabric.  Trim the extra fabric once you're done!  I really think some simple illustrations would help the pattern instructions.  Forgive my crooked stitch lines.  Those embroidered dots are thick and sometimes would knock me off course.  I'm happy this is the lining.  See!  The shell was more even!


I've decided to bag line the whole thing so I'm going to attach the top line of the trim to the shell, and then wrap the bottom of the trim into the seam as I sew on the lining.  First I have to make the trim.  About 10 yards of bias trim.  Tedious!  Then gather the long sides top and bottom.  More tedious!  You just can't gather more than about a yard at a time without risking knots and tangles and failure.  Once I'd made about half the trim I gathered it and attached some to the cuff.  Step by step next, but I wanted to show the result.  (I'm very happy with this). AND I'm having 1,001 problems adding to this post.  I'm going to start a new one taking up where this one left off.  Clearly the interwebs are telling me this post is too long.  See you again in a moment!

Tuesday, May 1, 2012

Group 22 of 1912 Project High Tea - Lisa

Robin hosted a lovely high tea for the ladies in Group 22 of the VPLL 1912 project.  This was the first time that we had all met in person rather than online. It was to have been co-hosted by both of us but I was waylaid by the real world (work travel).

This was done though she is still quite heavily casted for her broken foot. The tea was perfectly lovely.  There were tea sandwiches, scones, fruit tartlets, lemon curd, and even Devon cream, and, of course, tea (Fortnum and Mason Assam Superb, Irish Breakfast and Earl Grey).  After tea had been consumed, there was also champagne.

The instigator of the project, Janyce Hill, brought some of the source material for the project.  There were actual squeals of delight.  The illustrations were simply delightful.  In addition, there is nothing quite as wonderful as the conversation among a group of like minded people.

I now make profound apologies for being impatient (yet again) and taking pictures without letting Robin set her camera for the intermittent shadows.  I don't care if my face shows up and yet, I've opted against including any pictures of myself in this post.  My dress is already well documented here and I absolutely loathe how I looks in it. (Totally unfair, as I loathe my dress just as much, if not more, than she does.  I think Lisa was taking advantage of the fact that I can't run away right now!)

Here is the group, minus Lisa and Linda, who was not in costume.  Pam (right) is wearing a blouse and skirt created from patterns from the VPLL 1912 project.  Janyce is to the left, and Robin is hanging on to Pam for dear life.


Subjects that we covered:
History of the project
Upcoming patterns
Sewing techniques (and sharing them)
Challenges in updating and modifying patterns
Fabric
Costumers Guild
Costumes from other eras
How much we all love doing this.


Separate from all the tea and fun, there was a little sewing done too. (There was no sewing done on my front as my "sewing workroom", which is the dining room, had to be cleaned up for the party and I spent all my time polishing silver and washing china - R)
I need to finish my renaissance corset in order to even THINK about cutting out a bodice, or making the waistbands for the skirt and underthings.  I also need the neckline in place so I can finish my chemise (sort of made a mistake cutting the neck opening...maybe).
I've got everything done that I can.  Now I need another fitting to determine where to put the center back lacing grommets and boning.  All those boning channels are incredibly tedious to sew.