Wednesday, June 27, 2012

Rob's Project Wish List

I was reviewing all the projects I've got lined up and I started to panic a bit. I now vow to stop buying fabric until I get through at least three quarters of the projects  for which I've already bought fabric.  Here's my Wish List:

Finish Vic day dress-The due date is August 4th for the Dickens Picnic, but I want the bodice done right away.  The skirt can wait while I keep working on the corded petticoat.  I have a cage crinoline made for a previous dress as my backup, but I can't hem the skirt (or attach the waistband) until I decide which one I'll be using.
Corded Petticoat - I only have 5 rows of cording done.  This is tedious and I go "white blind" quickly
Renaissance outfits for Rog and Rob- I have the fabric but not all of the trim.  I keep changing my mind on what I want my dress to look like.  Roger's outfit will be first and I plan to finish his doublet muslin this weekend and cut out his "pumpkin pants", sewing them up first so that the doublet will fit well over them. I was going to do the doublet first but, upon further research, found out it's better to fit the doublet over the pants and shirt. The shirt is done.
1912 Project Dress - I've downloaded the pattern and read about other sewists trials and tribulations with this dress.  I may just get this up to muslin stage in my size and put it aside for later.
Polonaise outfit in Seafoam green and black - I have the fabric and I borrowed Lisa's pattern.  That's it. I haven't done 1880's yet, so I'll need to make the bustle cage, too. This one is due in March of 2013, I think, for a Sherlock Holmes dance.
Decorate lavender Vic dress (actually finish it????) - I never really finished trimming this one as I ran out of time for last year's Dickens Faire. It is rather plain according to Victorian standards and I want to gussie it up a bit more.
Ballgown bodice for lavender Vic dress - The muslin is cut and fit for this and I have leftover fabric. I've read that Victorian women often had a ballgown top and a day top for one skirt.  Makes sense to me.  The Pagoda Sleeve on the day dress do make for some heated dancing, so I'd like to get this made up sometime this summer. I also have enough plaid material left to make a cotton ballgown bodice if I ever get around to it.  Maybe I'll work on both, but AFTER Ren stuff is done.
Regency - I bought some white Dotted Swiss on sale. I have the pattern, but I will need to make the corset before I even think of altering the pattern.  This one is a back-burner and I'm still lurking in the interwebs for inspiration.
1920's day dress for September 2013 Gatsby picnic - (Roger really wants to go!)I have some cotton voile fabric that may work, but no pattern. Gatsby can be either late 20's or early 30's and I just don't know which one would look best on me.  1920's would be more comfortable, but I have a feeling I'd look like a tank. Trolling the webs for inspiration, still.
Victorian capelet- I bought some lightweight midnight blue wool and some gray charmeuse satin for the lining.  I have the pattern for a full cloak but I want to make an elbow length version with a lot of ruffles along the edges. This has no due date, I just want it.
Cloak  - I have the pattern but am still looking for a sale on black wool. This cloak could be used for a variety of costumes, from Lord of the Rings to Victorian. And I just like capes.
Eowyn dress or Arwen dress - PEERS will be having a Lord Of The Rings Ball in 2013. I want to be an elf, but Lisa suggested we go as the Warrior Women of Rohirrim. I got the patterns (I love Joanne's pattern sale.  For 99 cents, it's worth it to buy the pattern just for a sleeve I like!).  I have linen, but this is in the future stack, also.
T-shirts/Tunics - I have several lots of knitted jersey that I'd like to make into tops.  Will I ever have the time? Who knows

As you can see, the Wish List is...extensive. I'm not one of those people who stick with one time period - there's a beautiful costume just waiting for me in every decade. I just have to keep my nose to the grindstone and keep on sewing.


I love this post!  We are so the same, and yet so different!  I too have this many things on my plate.  Mine are mostly crazy-ass steampunk stuff.  Where Rob likes different eras, I want to play with different materials (metal and cardboard).  And I can't dance.  At all.  Lisa

Catching up on too many projects - L

I've got too many projects on my plate.....
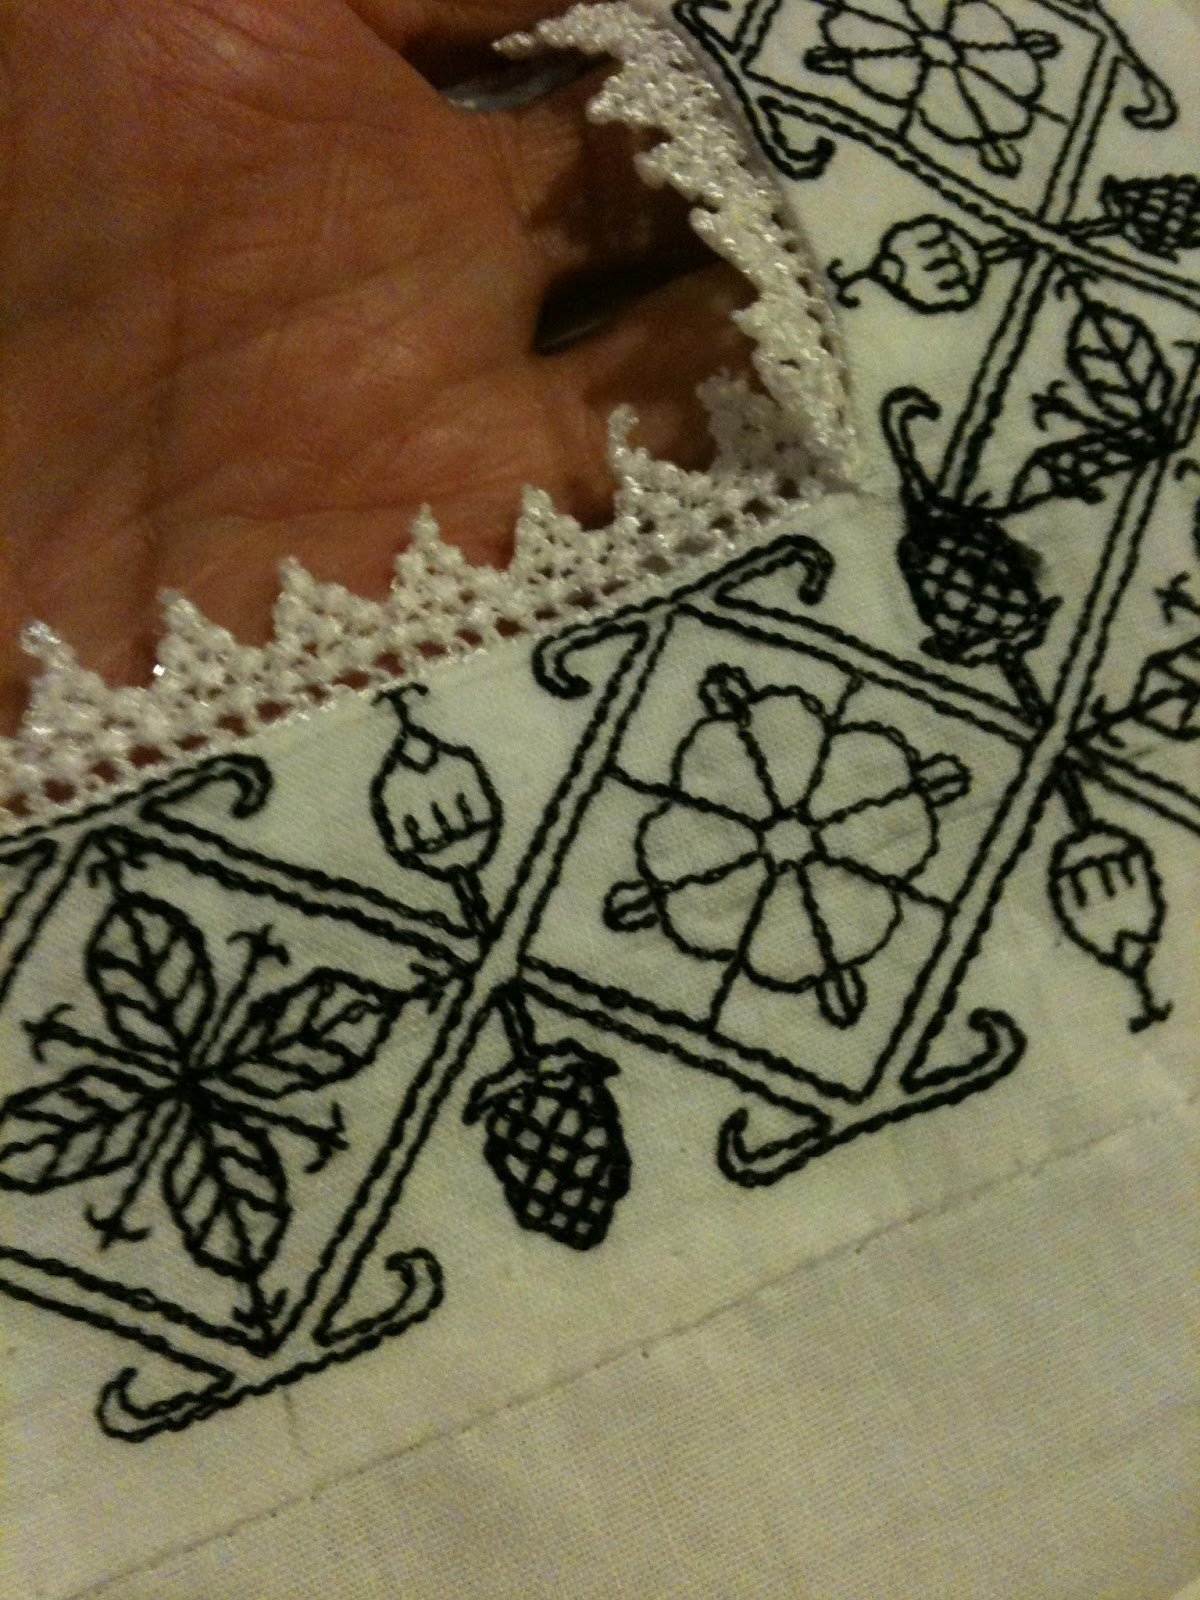
I finished the Elizabethan corset, allowing me to check the neck on the chemise.  I've added the blackwork and lace and finished the neck of the chemise and am nearly done with the sleeves.  All that's left is to sew the sleeves to the body and a little finishing.
That means my Elizabethan underthings are done!
(on to the dress)

I'm also working on my 1850's victorian dress (yeah, yeah, it started as 1840s but it's not really happening that way)

Today Rob is going to help me pick trim so I can get moving on the skirt.  I have a bodice muslin cut but it needs work.  Once that's re-done, I can fit the bodice and get going on that. I'm locked in that nasty space where there are lots of things almost done yet I can't quite finish.  A whirlwind of if-then's that are hanging me up.

Here are my favorite trim options:

 Fabric is a pale taupe and peach plaid.  That often looks grey and pink.  I got some grey ribbon that looks violet next to it, and some moss green that looks apple green next to it.  Sigh.

I've tried a couple more ribbon options including a dark olive (top picture) and a softer celadon with a sheer center (bottom).
(sorry for bad blurry pictures)


I also have a dark grey fabric scrap that I really like next to the plaid but it's both boring and impossible to match in ribbon.  I really hate the idea of making skinny fabric strips (translated - I don't like it THAT MUCH).

Once I pick the ribbon, I will have to corset up, put on my petticoat and the skeleton of the skirt.  Then I can determine where to put the trim and where to put the waist.  I cut it extra long because I didn't know how much volume the petticoat would
take up in the length.  I can also finalize the petticoat hem.  And if I was really smart, I would re-cut my bodice muslin before I do that so I can check the new muslin at the same time.  If the bodice still needs work, I'll wait.  If it seems good then I can steamroll ahead.

See...that last paragraph...all those little things that are sort of dependent on each other, are fussy, and, and, and...I will feel so much better when they're done.

Meanwhile, the weather is beautiful.  I suddenly want to take a walk on the beach.

Monday, June 25, 2012

Rob's 1850s Victorian Day Dress


1859 Pagoda Bodice            I'm building a Victorian day dress.  Lisa and I thought we'd do 1840's but the more we researched, the more 1850s we became. I'm using the Truly Victorian pattern for the 1859 agoda bodice.http://www.trulyvictorian.net/tvxcart/product.php?productid=8&cat=1&page=1  Here's the material and ribbon.  The solid pink will be used for bias piping/binding in a color called dusty rose.  The ribbon is trim, called dusty rose but it's a bit more orange.

 Here's the bodice back with the piped seams. Neat!  Except I forgot to "dive" the piping into the seam lines the first time and had to go back and re-do it. I've built the bodice, interlining it with silk organza, just because I'd read about it and wanted to see how it handled.  It's a bitch, wiggling everywhere when you cut it no matter how many pins you put in.  I ended up just sticking the pattern on it and cutting wide all the way around because of the shifting.  I then stay-stitched it to the fashion fabric, then trimmed it.  This will be lined in plain white muslin.  Here's the inside of the bodice with bone casings, waiting for the bones. Below you see my bone drying rack.  After I hand filed the ends, I sprayed them with silicone spray.


Pagoda sleeve lining
Sleeves with trim and piping, read for hand stitching


Here is the big ole skirt with all the plaids beautifully lined up.  Huzzah!  Below are trim ideas.  I went with two sets of trim spaced further out because.... it's a big ole skirt! I used a panel from the Truly Victorian Ballgown skirt http://www.trulyvictorian.net/tvxcart/product.php?productid=1&cat=1&page=1  but only lengthening one panel as a pattern, really just a trapezoid.


Fashion plate, 1854, the Lady’s Companion 
Here's the inspiration for my sleeves. I need to find some lace. Most plate I've seen show engageants or under-sleeves that are closed.  I need the air circulation cuz it'll be hot in August and I'll be dancing in this sucker!

Now I have to have another bodice fitting with Lisa for the final final and because I messed up a bit. You see, I made the piping, then sewed the bodice, but forgot to move the needle back into position, so my seam are 3/4" instead of 5/8".  I'm hoping that I have enough room in the side seams for that to be fixed, but if not, I'll have to rip and resew.  Pray for me.

 I made the waistband and finished the sewing the trim on the skirt. The remainder of the sewing will have to wait until I choose skirt supports - either the existing cage crinoline or the new corded petticoat, so the skirt is now "on hold". Lisa and I have scheduled a bodice fitting for next week, so the bodice is on hold. Onward to cording and Renwear!

Addendum: Worked on cording yesterday and FELT as if I was making progress, but when I check the time, found I'd used 3 hours to mark and sew only 10 lines of cording.  I've now decided that the skirt will be fit to go over the cage crinoline because, at this rate, I'll never get this petticoat AND the Renaissance stuff done in time. The corded petticoat is hereby relegated to the back burner nad my dress leaps forward in time to 1856+, when the cage crinoline was patented.

Update: Decided to get the petticoat all marked first and am still not done drawing chalk lines! It doesn't help that, with a broken foot healing, I can only stand on it for short periods.  Mark with chalk, ice foot, mark with chalk, ice foot. Ugh! Tedium comes in all fashions.

Blogged about our fitting progress here: Marathon Fitting

Progress report: After the Marathon Fitting session, I re-sewed the back seams. Because I was taking it in even more, the piping was too short, so I had to cut new piping.  This means that I will have to make additional piping to go around the bodice edges as this time I'd actually only made just enough instead of the usual 6 extra yards of just-in-case piping I made last time.

I piped the sleeve/shoulder join, taking the cord out of the piping at the armpit area. Hmmm.  This makes for a very unforgiving armhole.  I've hand basted everything in, and yes, it took me two tries to get the sleeves even and with a good distribution of fullness (the first time I ended up with a wad of material by the shoulder blade which looked terrible!). I panicked when I tried the bodice on and it didn't fit, but remembered I didn't have my corset on, so of course it doesn't fit right!  There's no getting around the fact that a dropped shoulder limits your arm mobility. Evidently that's the way it was, from my readings, to keep a woman's motions "demure".  On the previous Vic bodice, I changed the armhole and ended up with a modern shoulder.  This time I'm determined to get that period look.  If that means I can't raise my arms then so be it.  The bodice is looking very nice, but there is still a lot more fullness in the sleeve than the pattern drawing shows.

 I've now finished everything except the bodice closures.  Everything is taking longer than I thought! I also discovered that the reason I was struggling with hand sewing was that my needles sucked.  Once I grabbed a good needle from the cushion, the struggling ended.  I threw those other crappy needles away so I won't pick them up again!

I took 12 yards of thin silk ribbon and 6 yards of 1" wide silk ribbon and played with dye.  It took me several tests to get what I wanted.  Now I will sew the ribbons together to make a larger "striped" ribbon to decorate the bonnet.  Silk feels so wonderful but ironing ribbon is tedious. Dharma Trading has a good selection of woven silk ribbon
After I'd finished dyeing the ribbons, I threw the dye out then remembered:  I still have frogs to dye!  So I mixed up another batch and threw in 8 frogs. I got these at Cheap Trims . 


The frogs are ecru and took up a lot more dye than the ribbons, but I'm leaving them as is.

I got a few frou frous from Hats by Leko. Here's a pic of some vintage berries I bought earlier.


I'm not going to line the bonnet, just decorate it (I can always line it later but I'm pressed for time right now) I've attached the ribbon ties and crown ribbon and had the crown ribbon cross over in the back. I tried making some flowers, but the silk is floppy, so I need to figure out some other way to use the ribbon. Stay tuned.

While waiting for the day of the final fitting, I was wondering what to do with my hair. See, I chopped it all off in a sort of 1920's bob several months ago and am now growing it back out. I can just barely make a pony tail.  This will not look period appropriate, yet I don't want to wear the full wig I wore for Dickens Faire because August is HOT here. Instead, I found this at Voguewigs.com: It's a sort of drawstring bag/comb combination and should be enough for a stylish little chignon. "Why do I want a hairpiece if I'm wearing a bonnet?", you might ask. Because I know I don't want to dance in a bonnet!

Note: Got the hairpiece and it is BROWN! The color description mention red tones, but it is brown, so I'm sending it back and ordering one that mentions strawberry blonde in the description. They looked similar on two different monitors, but I guessed wrong.

Parasols: Lisa and I didn't want to spend big bucks on parasols, so we opted for those Chinese jobs. Yes, those types of parasols weren't popular until around the 1870s, but we've decided we are very forward thinking types with well-traveled connections who brought us back these little gifts. I found a used carved wooden cane at a flea market and had S.O. attach the parasol to it. That way I won't have to hold my arm so high all the time.  It came out pretty cute.

Lac for the sleeves:  After torturing myself with experimentation, Lisa gave me some lace and just said "sew it on, you are running out of time". Which I was, which I did. Mischief managed, it is done and looks good. May not have time for a lace collar, though....

HOOK & EYE TORTURE! I sewed on a bunch of hooks to the top without noticing that the package gives you a choice of looped eye or bar eye, but only half as many as there are hooks. So I went on to the next package and found I'd bought one size up! OK, I replace the smaller hooks with bigger hooks and sew them all on, yet I am minus one hook/eye for the neck closure in "stainless steel" color, so I dive into the stash for black and find out my black ones start the next size up!  So I have three different sizes of hooks and eyes on this bodice. I am terrible at this.  I've read many articles on how to sew these suckers on neatly. I follow the directions and I still can't get them to look tidy. Here's a great Threads article if you should feel inclined to find out how to sew them on properly:
http://www.threadsmagazine.com/item/23267/how-to-attach-hooks-eyes-snaps


Done!
I should be finished with the three frogs today so the outfit will be wearable, even if it is not "finished".

Yoked Petticoat update - L

Back from vacation, and I'm back to work on my yoked petticoat.  Being a 'robustly' shaped woman, I decided that I wanted the bulk of multiple petticoats, but not the volume around the waist.  After aggressive web search, I decided to try and make a two layer petticoat with the underlayer corded and the top layer ruffled and attach them to a yoke with a single waistband.  I made up a yoke from scratch (and scraps patched together see sally petticoat) and made a corded layer.  I plan to add some more cording at the bottom of this layer IF I have time.  I already have about 35 rows.  Next I made an A-line muslin layer and stitched 5 tiers of gathered tulle to it.   The plan is to attach muslin ruffles over the tulle ruffles to smooth them out.  I have enough room to add another layer over those two if I really need it.  But I don't think I do.

I used about 60 yards of tulle.  Pretty much a nightmare, but pretty!  I cut muslin ruffles about 3 inches longer than the tulle ruffles.  I want them to smooth the tulle tiers so I'm starting each one under the edge of the row above it and letting it hang down over the next row.  And I'm adding lace to the bottom tier.  In case I get dancing like a crazy woman and my petticoat shows!
(I don't really dance, but I do sometimes act silly)
This just sounds so simple and straightforward.  And it is.  Except for the volume.  For example, the center tier (pictured here) ... the base muslin is about 90 inches in circumference.  There is about 13 feet of tulle gathered for that layer, and about 10 feet of muslin I'm TRYING to gather over it.  I get it pinned.  I moved it to the machine.  I only hear about 2 pins drop.  I get the fabric in the machine and realize I've probably lost 4 or 5 more.  Then a random but of tulle pulls the thread out of the needle and I have to re-thread it.  The ruffle is shifting due to lost pins!  Sigh!

Here is what it looked like.  I felt like a marshmallow.
A very dainty, fluffy marshmallow.

Once I got 4 tiers of muslin sewn down, I tried it on to see how it was going.  I didn't bother with a corset, since my goal was to figure out if the length was OK and if the muslin layers smoothed the tulle enough to prevent a bumpy silhouette.

I got a couple of blurry phone pics.  Don't blame the phone, though, blame the dusty mirror.  I love the ruffled petticoat.  And the lightweight cotton plaid for my dress seems to hang pretty smoothly.  Hurray!  (I really did NOT want to make another layer)  You can just make out the canvas yoke in the picture.

After I finished I decided to add a piece of stiff interfacing to the bottom of the corded layer.  It gave me a better shape.  I also make a little 'pillow' for my backside.  Again, to help the shape
of the skirt.


Thursday, June 14, 2012

Short Sewing Sunday

We've been quiet, but busy.  We each have multiple projects in motion at once, and at various stages of completion.  This last Sunday, we got together to do fittings.  We thought we might squeeze in some actual sewing, but fitting took precedence since that's one thing we can't do on our own.  It's a shame, really, since sewing underthings like petticoats is generally boring, and waaay more fun to do in company.

Lisa fit her renaissance corset for the final time, and Robin reset the back strap placement so the straps stay on.  All that's left is closing the boning channels and binding the top.  Lisa also fit her 1840's bodice (a couple of times) and determined the hem of her multi-layer petticoat (which means she also knows how long to make her skirt).

Robin fit her 1840's bodice and a ballgown bodice.  She also got to try out her new corset.  PRETTY!

But first, a quick science picture!

Did you get a chance to see the Venus Transit?  We did our best with a telescope lens and a magnifying glass (the image is projected on a blue shopping bag).  See the faint circle in the upper right quadrant of the picture?  We're pretty sure that was Venus (black dot inside the circle).  thanks Greg!

So we will try to take more pictures soon.  And really, how many pictures can you expect from an afternoon of corset and bodice fittings?  We were really busy and often fairly naked.

And if you haven't been following recently, here's what we've been up to:
Men's Frock Coat

Yoked Petticoat - 1840's
Elizabethan Corset
(scroll to the end of the post for the most recent updates)

We will start posting on our 1840's dresses soon.  They are still mostly just ideas.

Wednesday, May 30, 2012

VPLL 1912 Skirt 0162 - L

E0162_SKIRTMy next pattern for the 1912 project will be this skirt.  I like the braid design in the front and the buttons.  This skirt is designed to be VERY high waisted.  The pattern has a 25 inch waist that very quickly spreads to about 32 inches.  Needless to say, those numbers don't match ME.  So time for more pattern alterations.  I took my measurements at waist and abdomen.  I need to add...O.K.  I just can't post it.  The number are just too awful.  I need to add a lot.  The skirt doesn't HAVE side seams. So I can't just add to the side seams.  Instead, there is a center panel with the closure on the left front side.  Then there is a back panel also cut on the fold with pleats added on the lower half.  Finally, there are side panels with darts at the hip.  So what to do.....

The center front panel is 10 inches.  I'm leaving that alone.

The center back panel is small.  I'm going to cut that on the selvedge rather than the fold, and added a center back seam.  I can add to the waist there AND I can make a zipper closure.  I may just want to make this skirt mid calf and wear it to work, or out and about and I don't want to deal with the hook and eye front closure.  So I add about 1/3 of what I need in total at the center back.  (I add half that distance to the center back seam plus a seam allowance.  For instance, if I'm added two inches to the back, I will add 1 inch to the center back plus a 3/8 inch seam allowance.  The other nice thing about adding a seam here is that if I need to take it in a little, this will be a good spot to do it.

Side Patten Piece with Alterations
I'm adding the rest to the side panels.  But wait, I can't just add anywhere.  There are darts designed to provide a curve at the hip.  If I add randomly, then I'll have a hip curve in the wrong place, and no curve where it's needed.  ALSO, the hem circumference seems to be about 72 inches,  and I don't want it any fuller than that.  So here's what I do...   Let's just say I need to add 4 more inches.  I divide in half since I'm adding equally to each side.  Now each side panel needs 2 inches of width added at the top (but not all the way down to the hem), and I don't want to change the position of the dart.  I slash the pattern on either side of the dart, cutting down nearly to the hem. The I spread the slashes 1 inch each and tape them in place.  Now, when I cut my two side panels, they will each be two inches bigger, but the dart will be in the same place (relative to the whole pattern) and the hem will not be fuller.


I cut a muslin and sewed it together following the pattern instructions.  Easy!  And I like the look of the top stitching.  The muslin ended up being a little too big but I pinned that out of the center back seam.

Next I need to figure out how I want to make the decorative panels in the front.  I'm considering embroidery or stitching black soutache to a black satin ribbon in a pattern similar to the one that came with the skirt pattern.  I bought some black polyester gabardine for the final version.  Yeah, I pretty much hate polyester, but the price was quite compelling.  Especially on sale.


Braid Design for Front of Skirt:
I needed a way to get the design marked on the black ribbon.  I tried white carbon paper.  Rubs off too easily.  I considered frixon pen, but I still had no way to transfer the design without free-handing it.
I ended up making photocopies of the design and taping them together in a long strip.  (I made two strips, one for each side).  Then I sewed the strips to the ribbon following the center curve.  I'm sewing the soutache to the ribbon using the pattern on the paper and I will take the paper off when I'm done.  VERY carefully.  The design on the pattern isn't an exact repeat (so I did my best to make it match on the ribbon).  The soutache had to be hand sewn since I'm not good enough to do those tight curves on machine.  It took FOREVER.

Skirt Construction

Once the decorative ribbon was done, I could sew up the skirt.
There are lots of options for waist finishing.  I decided to fold over about an inch and a half at the top and  support it with  twill tape.  This needs to be determined before you do anything else since it may change how the darts are sewn (and in my case, where to start the zipper).

Pressing - There is a lot of this needed before sewing starts:

Fold and press seam allowances on center front front, clipping as needed.
Fold and press seam allowance on sides of center back down to beginning of the pleat.
Fold pleats on center back per pattern marking and press into place.

1-  Sew up center back to base of zipper, install zipper - I left 1.5 inches at the top for waist fold AND I also added a tab for a button at the top.  Hook and eye is a valid option, but I wanted to try the tab.

3-  With sides and backs right side together, match the pleat seams and sew.  Sew across the top of the pleat as much as possible.  Clip as needed. (no picture)


4-  Pin the top of the center back sides over the side panels.  Clip and ease as needed.  Top stitch very close to the fold.  Top stitch again 1/4 inch in from the first seam.  Remember directionality!  To get smooth parallel lines run both seams the same direction (start both at the top).  
(zipper, tab, top stitched seams shown in photo)


5-  Sew hip dart.  Remember to account for the fold over waistband when sewing the top of the dart.  The top 1.5 inches of the dart should mirror the NEXT 1.5 inches.  That way the waistband folds over smoothly. Alternately, start the dart AT the location of the finished waistband.  The dart markings on the pattern are intended to start at the finished waist.

6-  Pin the center front over the top of the side panels.  Pin the ribbon under the center front at the top of the narrow section.  Top stitch the center front in place.

7-  Top stitch ribbon on place.  (I did this last to make sure that the ribbon was flush against the top stitching).


twill tape basted in place, ready to fold raw edge
8- Fold over waist band and press.  Pin twill tape and sew raw edge at top over twill tape band.  Then fold over again and top stitch the waist.

insde of waist - folded over & stitched


9-  Add decorative buttons per the accompanying picture and hem.  (photo shows top stitching in front, a hint of the waist top stitching, plus my fancy plastic buttons!)


And I'm done!  I love it.  I will actually wear this.  The seam-less sides drape really nicely.  Very flattering.  I also highly recommend the zipper.  Without a corset, it would be nearly impossible to get a side front closure to lay nicely.  In fact, I will wear this with my Spring Mantle to tea!  I wish I could get better pictures.  Black on black is a &^%$# to photograph.


Pattern review:


VPLL Checklist
1.         Pattern Name - Skirt 0162
2.        Sewer’s Skill Level: Advance, Intermediate, Beginner - I feel like I've improved to intermediate
3.        Pattern Rating: 1-Not a Fan, 2 – So-So, 3 – Good/Average, 4-Better than Average, 5-I LOVED IT! and why?
        5 - I loved it.  There are any number of ways to style this simple skirt to make it perfect for any person and any occasion.  I loved the chance to play with the soutache trim, and the rest of the pattern is fairly simple
4.        What skill level would someone need to sew this pattern and why? - I think this is intermediate, only because the braid design is challenging, and without a waistband the finishing requires a deft touch.  I didn't do the side front closure, but that is definitely NOT beginner work. The bulk of the sewing is fairly simple, but it requires precision, confidence and experience to do it right.
5.        Were the instructions easy to follow? If not, what needs to be changed?  Instructions were easy.  I chose not to follow them.  I think adding a zipper, or the option of a zipper would really be helpful.  The front closure is likely to pull apart unless the wearing is corseted.  I listed the steps I took for construction, along with details on my braid.
6.        How was the fit/sizing?  Did it correspond to what you thought?  Exactly as expected/shown.
7.        Did you make any pattern alterations? If so, what alterations did you make? Where they fit or design alterations?   I made both.  I needed to make it larger, and I didn't want to increase the width at the hem.  Detailed in post.  I chose to put the braid design on a ribbon and attach it after top stitching.  And I changed the closure to a center back zipper with a button tab closure at the top.


WWND - Frock Coat - L

What Would Nathan Do?  After claiming he had no interest in participating when we dressed up in our costumes and went to events, my SO finally caved in and said that IF I made him a frock coat he would wear it.
(He actually wanted to be Captain Malcolm Reynolds of "Firefly" (Nathan Fillion), thus the WWND - R  AND he wants a space gun...- L) But, of course he can't just wear a frock coat, can he?  I bought a shirt and pants from Wild West Mercantile, but made a vest, a frock coat and a cravat.  After watching Robin sweat thru the Laughing Moon men's pattern, I opted to try Simplicity Historic Pattern 2895.  It's got the coat, vest and shirt.  Sadly for him, I bear no resemblance to Inara in feature or figure.  So no cosplay for us!

I made muslins for the vest and the coat.  Very few people naturally fit patterns sizes.  The vest was fairly straight forward.  I needed to adjust for stomach, and shoulder angle.  My 'model' has shoulders that go straight across without any downward slant.  In addition, he has a tummy that is a bit bigger around than his chest.  This creates 'issues' around the armscye.  The vest was a GREAT trial run for modifying the frock coat.

Here it is with the usual cat ornament.  It was also a great chance to practice welt pockets.  I 'fixed' the chest-stomach problem by cutting the pattern for the chest size and then slanting the center front out, and adding to side seams.  Eliminate the front dart and voila!

The coat muslin was more of a challenge.  I had to modify torso length and sleeve length.  I also modified the front like I'd done for the vest.  The biggest problem was the shoulders.  The Victorian cut means the front goes over the shoulder and angles down toward the sleeve.  It's more difficult to modify shoulder height because changing that shape also changes the armscye.  I did my best when I cut the pattern, and then I just trimmed off extra or glued on where fabric was missing.  And I did all this while he had the muslin on.  The shoulders took 4 fittings, and I ended up shrinking the armscye to accommodate a larger range of motion without pulling.  Then the sleeves seemed wonky.  Luckily, Robin helped me fit the sleeves so any untoward changes I made worked out in the end.

I'd like to thank Lisa for actually using tailor's tacks.  Lisa is a bit of a "seat-of-the-pants" sewist and that sometimes creates problems for those trying to give her a hand. Those tailor tacks gave me a rough idea of where the original pattern said to put the sleeves and I fit them in according to the old fashioned inset sleeve method I learned as a kid.  I had to readjust several times to get it just right for Greg, but it worked. 


Here he is, all done (well, except for shoes and a good pressing)