Showing posts with label Steampunk. Show all posts

Wednesday, April 24, 2013

Finished the jacket - L

This is the Truly Victorian pattern TV 464 Riding Habit Bodice.  This is not designed to be a 'properly tailored' jacket.  But it looks like one.  And it's all me.  I love all menswear inspired stuff, and am not generally a frilly kind of girl.  Then again, a peek of ruffle or lace is always awesome.


It's just a quick phone-pic.  The fabric is grey wool lined with black satin.  The lapels are black wool and the collar is black velveteen.  The shiny things at collar and cuff are the pins I made for my skirt.  As skirt decorations, they were a disaster.  They caught on things, snagged the skirt, and fell off.  Please note the small bit of cat in the upper right corner.  The fur is beautifully coordinated.

(prior post with the decorations and the skirt is here)
And a poor quality mirror picture actually wearing it:


Tuesday, April 23, 2013

RELEASE the....yeah, you know - Lisa

IT'S DONE!  Sure I have some wires to trim.  I still haven't decided if I want to glue washers to look like suckers.  I hope to actually put it on and take pictures very soon.  And of course I'll be wearing it this weekend at Nova Albion.  

It is big.  It is heavy.  I am happy.  

You really can't see the butterfly bustle in this picture. And I forgot to buy batteries.  So I'll have to post another picture tomorrow.  Thing is, it hung like this all night and NOTHING FELL OFF!

What you can't see is that the eyeball casing opens and closes to allow access to batteries and to turn the eyes off and on.  And the latches I bought to keep it closed were too big.  So right now it is help closed with masking tape.  Worst case I will use clear packing tape to keep it closed.

Here is a side view.  See how the belt is pulling away?  This is what had me concerned.  This will pull my waist bands every which way and look crummy.  THIS is why I made the swiss waist.  And a butterfly bustle made with window screening.

Now I can wear the kraken with impunity.  Things can pull any which way an no one will see.  Everything will be stable and hidden underneath. 

I finished that last night too!  See the clever elastic sides?  Easy to hook and the hooks stay taut.  It also has clever little rings hanging in the front.  For gear.


Wednesday, April 10, 2013

Putting Kraken parts together UPDATED- L

A quick glimpse of the nearly finished eye casing.

The bubble wrap background will likely be replace with something less obvious, even though it DOES look kind of awesome.

By the end of the day today the eyes and the body will be connected and the tentacles underway.

And the best part?  The wavering lines of the plasma ball hypnotized one of my cats.  He sat and stared for nearly an hour; occasionally leaning in to sniff.

I have now started working with my fourth type of glue. This one works well.  Unfortunately it can only be used to glue flat surfaces together.

       ---------------------------------------------------------

I'm NEARLY ready to put this together which WILL include tentacles.
My lack of experience and proper tools is hurting.  I have tried so many, many glues.  Most take 36 hours to set.  This means it takes a couple of days for me to learn the extent of my various failures.  But I have not given up.  I have loads of tiny cuts on my hands.  I have random glue blobs to clean off my 'head'.  I still have some aging and pounding with a hammer to do.  I'm really looking forward to the hammer part.


My current struggle is to get the flaps around the eyes to lay flat.  They don't want to lay flat.  Nothing sticks to them.  Last night I cut the pieces that will attach the head/body to the eye unit.  And if you look carefully, you can see a plasma ball in place. I still haven't figured out how to hold the eye piece closed.  It needs to open and close to allow access to batteries.   Did I mention that this bad boy is HEAVY?  I haven't even added the tentacle tubes.  This weekend is very busy and I'm not sure I'll make much progress.  But I can hope.

On top of this, I got volunteered to help with costumes for my son's acting class.  So far, other than minor repairs, I have 4 sets of wings, a halo, 4 girl's colonial dresses (including one stars and stripes for 'Betsy Ross') and 6 boys colonial vests.  The difficult stuff comes today with 'fantasy creatures' (I know there are at least two flying cheetahs).  And I have 4 short weeks to do it all.  And no money.  Magical!!!

Thursday, February 9, 2012

Catching up on Projects - L

The 1912 Project has consumed a huge amount of mental bandwidth, if only because of the outpouring of information in the FB group.  But I still have projects in some degree of 'made' that need tending.  Not to mention that I've taken on the 'Challenge Pattern' from 1912 Project.

First - clothes for a man.  I'm making a vest and frock coat.  The vest is nearly done.  Robin is going to do buttonholes for me and then I just need to add buttons and sew the lining shut.  And since the wearer is deathly allergic to cats, the cat is sitting on it.  I do love how it matches her eyes....
I'm also going to make a frock coat.  A black frock coat.  Sort of dreading it even though I'm using a different pattern than Robin (she felt hers was just too fussy).  I got the fabric and lining in the mail and they are HEAVY.  I may have got too heavy of lining.  Gonna have to think about this.
And, after resisting our silly costuming, he now wants a steampunk gun and holster.  When they fall, they fall hard!

I have also decided to try the 1912 Challenge pattern which is a slip.  It really appeals to me as a nightgown, although you'd have to be 10 kinds of crazy to pleat the flounce on a cotton nightgown.  I think I may pleat it for the project and set the pleats with vinegar but let them wash out over time.  The challenge of this pattern is all the lace insertion and pleating.  A separate challenge for me is sizing up the pattern from tiny 1912 to giant modern tall person who isn't skinny.  In addition, as soon as I looked at the pattern, it was clear that the flounce was not in the same proportion to the body of the slip as it was in the picture.  Aspirational marketing!  I really like the proportions so I'm going to change the pattern to reflect them.  I'm also getting wider insertion lace for the same reason. This is the first time I've actually printed out and put together an e-pattern.  I couldn't get all the marking to show up and I had to shrink it a bit but since I'm going to have to make changes anyway, I'm not concerned. I'm including a picture of the taped together pattern at the end of the post, even though the lines are faint and almost unreadable.  Tonight I will cut it apart and start fidgeting with measurements.  Anything to avoid starting the frock coat.

And here are examples on my insertion lace (2 1/4 inch) and eyelet lace (1
inch) for the neck


The shiny spot is light reflecting off tape

Friday, January 20, 2012

LOVE this boring costume - L

We're going to the Edwardian Ball in SF tonight (the entertainment night vs the actual ball).  All I have left to do is sew on some buttons and iron my blouse.  I'm really happy with it.  I realize that this event will be full of amazing, over-the-top outfits, and I will be dressed like someones maid.  I shouldn't be excited about this, but I am.  First, this is the outfit I was aiming for when I first created something to wear to a Steampunk event.  It embodies my ideal 'scientist', and I needed to make it properly.   Second, being large and flabby, I am just not comfortable showing a lot of skin.  Finally, I'm getting a chance to wear my homemade black hat again.  It lives in the odd region between 'hat' and 'fascinator'.  And it has real raven's claws on it (legally collected) and is crocheted from black wool.  A crocheted midi top hat.
(I'm totally channeling Jenny from 'A Good Man Goes to War')

Here's a more close up view of the top.  The sleeves are actually quite full from the shoulders and are pleated into the forearm. They just aren't ironed yet.  And I need to press/steam the tie.  It's vintage, from my grandfather. I will ask Robin to take pictures tonight when everything is as done as it's gonna get.  I wasn't sure I was actually going to get there.  After she did my buttonholes, I thought the rest would be a breeze.  I was so very wrong.  I had to hurry and.....yes I made mistakes.  I'm not going to fix them.  And yes...as usual, it's the sleeves.

Why are sleeves so demonic?


Here's a lower sleeve, pinned and ready to be sewn.  It took longer to pin and press, and a LOT longer to stitch down than I thought.  I stitched both sides of each pleat.  I got so caught up is pleating that I forgot that sleeves should be mirror images, not the same.  Didn't realize until I had them stitched.  I don't think it's terribly noticeable though.  AND I checked the size by wrapping it around my arm.  Of course there was a lot more 'give' in those pinned pleats than there was in the finished sleeve.  I had to undo the 'side seam' near the wrist by a about an inch and a half more than I planned so I have a decent range of motion (and roll the edge by hand).  I also added some lace at the bottom for length (and for pretty).

I have decided to name the blouse Ripley.  I watched Alien as I pinned and sewed.

Finally a picture of the pattern I used for this blouse.  Remember, I changed the sleeves to full at the top with tapered, fitted forearm.  Made the collar fit taller and more close to the neck.  Added length, added to the bust, raised the darts and added pleats down the front.  This is the only the second time I've flown this far off course with a pattern and not had a total melty.  Also, who's idea was it to call a pattern 'Kwik Sew' that has a two piece collar, fitted darts, and cuffs?

Monday, January 9, 2012

Learning the hard way - L

I cut the muslin for my new bodice this weekend.  It's mostly a hot mess, but I like the peplum, and the added pleat in the center back.  I'm thinking of using a different fabric for the pleat.  Not sure, just thinking.  The top of the bodice is wrong in many ways.  I expected to have problems.  The pattern is a jacket and designed as outerwear, and bust size is always a problem, especially when I'm in corset.  I successfully managed to add two inches in the bust and raise it about an inch.  I left too much room under the bust seam and need to take in quite a bit.  I didn't realize how much extra room is built into outerwear.  (I even cut a size smaller!)   I'll need to take it in all around the ribs and waist. And smooth the back.  And do something about the gap at the waist.  

Here's the mess. And the best picture I could get of the fabric.  Ah, shiny, reflective polyester!  I'm going to need Robin to help me re-pin all of these seams.  I haven't managed pinning in a mirror yet (though I may try it because I'm impatient).  One I get the bodice to fit, I have to add the sleeves and fit those.  I'm sure they're too big, and the shoulders are gigantic right now.  With everything wrong, I'm still excited. 
I also finished the farthingale, bum-roll, and all of the chemise I can do without embroidery.  I cut out the front panel and the over-skirt panels.  Next I'm cutting out the paned sleeves so I can start embroidering them.  The over-skirt is made from my old navy curtains.  I plan to decorate all the intersecting lines with pearls and faux stones.  The paned sleeve will be burgundy if I have enough fabric (bought a random remnant).  I'm very short waisted and confident I will look quite the divine bovine in this.  Ultimately, the front piece will be lined so the hoops won't show through.


Thursday, January 5, 2012

Bum rush - L

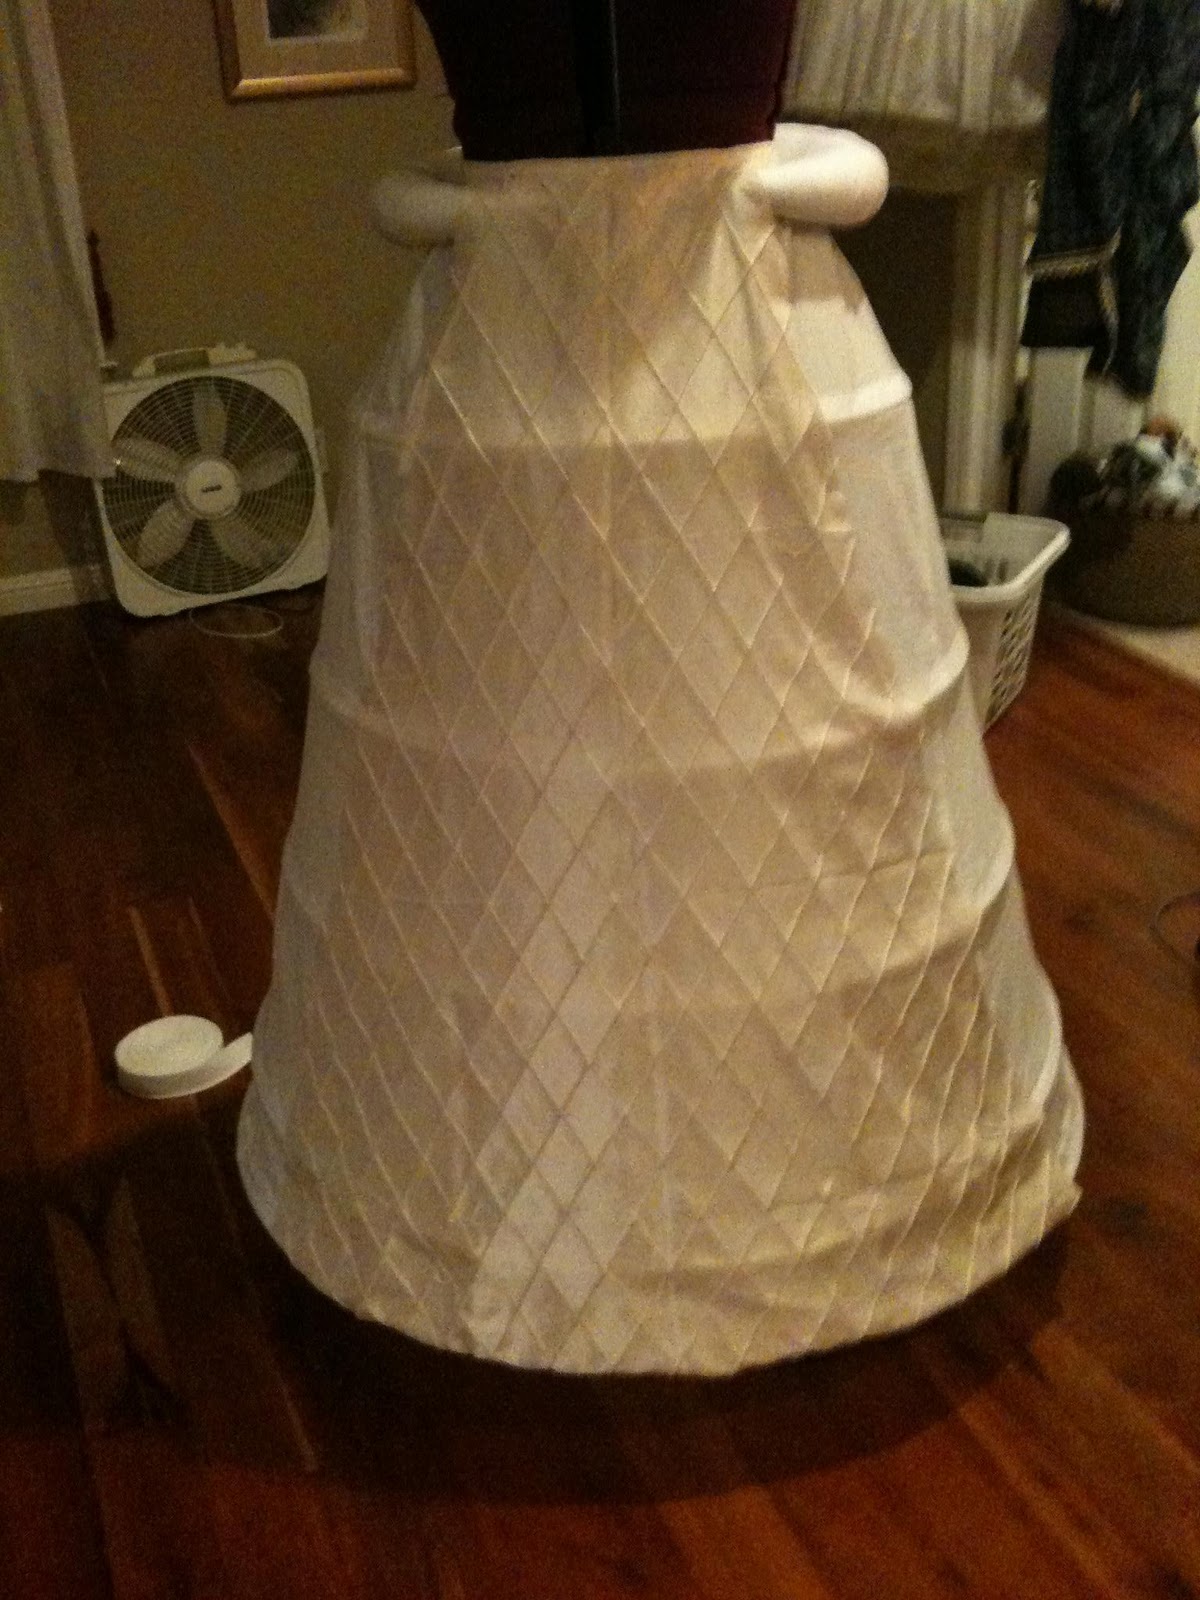
Farthingale is nearly done.  I have to add the very bottom hoop which requires I actually anticipate the hem.  And I'm being lazy about it.  I have to add the waistband.  My post christmas belly is asking me to wait a couple weeks for the bloat to go down.  I made the bumroll.  The Margo Anderson patterns are easy to follow.  Also, it turns out that the inside of a farthingale is a great cat playground.  You can't see it in the picture, but my farthingale has a tail.

Tonight I'm going to cut out the chemise.  I can't sew it yet because Robin is going to machine embroider blackwork on the neckline and sleeves.  I'm actually just drawing those pieces on muslin .

That means she's going to have to fire up the embroidery and make it work.  She claims she needed this kick in her bumroll to get her started.

We have signed up for the 1912 project.  I hope we're up to it.  For the most part we will just be making muslins and we are confident we can do this in a day, if we work hard (sorry, this makes me giggle - there are very limited instructions - we're in way over our heads, but we're still excited)

I've settled on the basic pattern for the bodice to go with my black skirt. It's a modern semi-fitted equestrian style jacket so there will be a lot of modification involved.
This is from the pattern back.  I plan to change the collar, make it very fitted (requiring mods for the girls) and add a pleat at center back for my bustle.  I'm leaning toward the handkerchief hem.  The bustle is black lace with layer of some sort of sheer black gold stuff I got on sale.  This outfit has taken on the title of 'Steampunk Malificent'.  I might have to make a large brass flying inset for a hat.  With horns.  Anyhow, I may start the muslin this weekend.  We're hauling out the Dickens gear to go to a 12th Night Dance on Saturday.  So I may not have as much time as I think.

I was blog-surfing this morning and saw this, which really inspired me.  (Alexander McQueen)


Tuesday, September 27, 2011

Front Closure Dilemna - L

I came home from a very fun weekend in Portland Oregon ready to sew on my hook and eye tape which would finish the polonaise except for adjusting the bustle tapes.  But oh, no.... 
I was expecting to be busy with work related stuff all day Monday until I caught my heel in my pant leg (on stairs no less) and ended up icing my ankle in bed all afternoon and evening.  Perfect for hand sewing!
Here is a diagram of what happened followed by comments.  And an accessory update ; } (apologies for format oddity)


I sewed the eye side on the left front, folding back any excess so it wouldn't show. The eyes stick over the edge.  Now I have to move the hook strip away from the edge so the center front remains in the center.  And NOW I have a big flap in the front.  To add insult to this, the hooks do NOT stay shut.  One big sigh and I'm topless.  So I'm down to deciding between sewing individual small hook and eyes, or caving in and making the buttons functional and sewing buttonholes.  I am concerned about gaps and pulling with buttons.

On a more fun note, I went to the Portland Fleece and Fiber festival and had far too much fun.  I acquired a 'humane' sheep skin shoulder wrap.  OK, I'm pretty sure that wasn't the intended goal of this item, but its what I'm going to use it for (Viking!).  The fleece felts ON the sheep, near the skin.  Careful removal results in what looks like a sheep skin but no sheep was harmed.  In fact, we hear the sheep is mightily relieved to be rid of it.  The picture shows the fleece laying on my bed, and 30 seconds later when the cat found it and aggressively attempted to subdue it.

She spun in a crocodile death grip, and growled her most menacing.

Friday, September 23, 2011

Hints of upcoming projects - L

I have a couple new projects I'm starting to work on.  'Starting' as in 'thinking about and gathering materials'.  One is the promised Renaissance gown and the other is a new take on Steampunk.  I am sort of excited about my Steampunk thing.  Here is a small part of the fun:


And then, for our Renaissance stuff, Rob and I thought we would like to have 'flea furs' or zibellinos.  So I have taken upon myself to craft them.  I bought some very cheap kid's clay at Target (It dries without heat) and molded a ferret-face.  Now I let it dry, while I'm off exploring Portland Oregon.  It's a little bumpy but it says it can be carved and sanded after it dries.  I plan to paint it gold and add jewels and decorations.  Rob has some faux fur that will work well for the body and tail.  If the face works, I'll make another, and paws for both.
Next week my final shipment of parts should arrive and I can finish the polonaise.  We have a sewing day coming up and I will model it for proper photos.  May even wear my hat.  Oh crap, I totally forgot I have to decorate my hat.  Grrr. 
I love a hat, but struggle with decorating.  I need supervision.  I have a very strong urge to hot glue all sorts of neat stuff to it.  Random, inappropriate, often not very pretty, stuff.     I can't be the only person who likes gull feathers....and marine mammal vertebrae.

Wednesday, September 21, 2011

The Turtle Seamstress Progresses - R


After a lovely trip to the Denver area (where I could not sew and had no hand sewing I could bring with me), I came home to a jam-packed schedule for the next two weeks.  I'm going to be sneaking in bits and pieces of sewing where I can.  Last night I sewed the knobby part of the busk into the corset.  It always scares me to punch holes in perfectly good fabric hoping I've marked it properly.  This time, I marked, checked, checked again and finally punched the holes, inserted the knob busk and sewed it up.  It looks pretty good.

On a side note, I ordered some Victorian boots, had to send them back for a larger size, and just got the new ones today, and entire size larger than I normally wear. I'll be wearing them around the house to mold the leather to my feet for the next couple of months.  Cute, huh? They'll be hidden under the 1860's outfit but will look fabulous with Steampunk.

Friday, July 29, 2011

Things I did, Want to do, and a BIG day tomorrow - Lisa

I've been making some crocheted lace, just to see if I can, and to use on my polonaise.  I made big ruffled lace for the sleeves, and something a bit 'less' for the hem,  Here's what it looks like, finished, with my fabric.
I still need to finish making more of the smaller stuff.  It gave me the idea of trying to make some that looks like toothed gears. 

I've got most of the material I need to make a Renaissance dress.  I'll post pictures of the fabric soon.  There are a plethora of images on-line that I might post, but the only thing that has captured my interest is how to treat my sleeves.  There are nearly no limits on what I can do, however what I want to do requires lots of layers and fabric which sounds ghastly uncomfortable.  So here I am, balancing comfort and style.  If you knew me, you would know that comfort nearly always wins.  I never wear skirts above mid calf for that reason.  But since I agreed to do this, I don't want to do a half-assed job.  Guess I'll see when it comes time to make them.  I'm looking forward to trying cartridge pleating.  And my steampunk jacket is bubbling up to the top of my mind.  I searched some images yesterday that each have a component that I want to include:


My fabric is a lightweight charcoal wool with a red (faux) silk lining that will show in the turn-backs and possibly at the cuffs.  I've got black and gold braid and little brass buttons with tiny elephants on them.  So lots of those.  I will have tails.  I like how they button up in the first picture, but definitely not that long.  I have a pattern for a jacket with a diagonal close up the front, and a riding jacket pattern, along with a cutting pattern for a violin bodice.  I should be able to scramble something together out of those.  Then I got some crumpled looking silk-like stuff to use for a skirt.  I think I will have it button up the front so I can have some fun with petticoats and/or bloomers underneath.  And I'm on the hunt for old belts to use for holsters and straps.

All this has to wait until AFTER tomorrow when we meet to catch up on fittings, hemming, trim choices and pattern work.  Here's what we have on the docket:

Lisa
Fit the muslin for the polonaise (final).
Hem brown cotton skirt.
Hem new petticoat, check for 'fullness'.
Review trim options for the polonaise and both brown skirts (one skirt is still an idea).
Pick up the 3 or 4 fabrics Rob is holding for me.
Look over fabric for Renaissance dress and review trim options.
Cut corset for Renaissance dress (at least copy the pattern).
Remember to bring all the things to wear under the skirts getting hemmed...don't FORGET!

Robin
Measure length for skirt over crinoline.
Measure for patterns she will cut in the near future (Pagoda top and corset).
Review trim for Victorian dress. There are lots of potential ideas here.
Work on bonnet pattern.
Cut the skirt for the Victorian ball gown.
Measure Renaissance patterns for trim requirements.
Make final decision on Renaissance fabrics.

This is do-able IF we multitask a bit and IF we don't open the wine too early.  (I do have to drive home) So we should have a lot fun pictures for next week.  I'm itching to start cutting and sewing again.  Something other than the interminable petticoat ruffles, and something that isn't beige.