Showing posts with label Elizabethan corset. Show all posts

Friday, July 6, 2012

Fitting Marathon - L & R

Imagine, if you will, fitting multiple garments from multiple eras....  It was a whirlwind of activity as we took advantage of the July 3 early close in stock markets to fit everything that we were working on.  Every surface was piled in fabric.  The floor was scattered in pins.  Robin's foot was a sad and pained thing that swelled and throbbed.  And we got a LOT of stuff done.

What we did, and what we learned while doing it:
Lisa:
Petticoat - multiple layers sewn to a yoke for mid 19th century outfits.  I'd sewn the top layer including lace on the bottom flounce and just needed to attach it to the yoke.  Robin pinned it to the yoke, allowing a level hem.  We also experimented with a 'bum pad'.  Yes...I pinned a throw pillow to my butt..
1850's skirt - with the petticoat pinned, the skirt hem could be pinned.  Well, actually the waist.  We both had already trimmed near the bottom of our skirts, following the plaid, so we adjusted the hem at the waist.
1850's bodice - THIS was interesting.  Being small boned but fat, I cut the back of my bodice roughly 5 sizes smaller than the front.  I expect to have problems matching shoulder and side seams as a result.  I had already fit a muslin and cut and sewn a new one.  So this should have fit nearly perfectly.  HOWEVER, when I was sewing the new one, I couldn't remember if I'd matched the shoulder seam at the neck or armscye. I chose to match at the armscye leaving excess at the neck (we're talking 2 inches of excess).  When I put it on with all my underthings, NOTHING FIT RIGHT.  Poor Robin! (When she does stuff like this, it makes me doubt my initial fitting abilities, thinking "I can't be THAT bad, can I?" until I find out that she's jacked up something on her own  Dude!  I didn't jack it up!  It is entirely impossible to know what to do with all that extra fabric. It wasn't THAT BIG the first time.) Luckily, before too much had been done, we decided to re-stitch the shoulder and our optional bust dart and see what happened.  It was all the difference.  Seriously.  Suddenly, everything fit.
Elizabethan underthings - I finished them.  I put them on.  The farthingale was too long so I'm taking a big tuck all the way around between two hoops.  The corset straps needed grommets, so Robin marked where they were supposed to go and I put them in (and yes, one of them is backwards).
Elizabethan bodice - Robin had taken my measurements and I compared those to the pattern.  It seemed odd and didn't make sense.  I decided to cut the pattern size that went with my corset size and add a bit to the seams on the front and side back.  Turns out I didn't need them, and Robin pinned them out.

Robin: I'd taken the train into the city so that we could both use one car to get to Lisa's house. I lugged my cage crinoline, petticoat, corset, drawers and chemise just for the fitting of the Victorian stuff. I also had to carry my Vic skirt and bodice plus the Ren corset.  Talk about a pack mule.  With my slowly healing foot, carrying that stuff almost killed me.  And then, the fitting sessions did me in entirely.

Lisa adjusted my Vic skirt from the waistband. Adjusting it over a hoop skirt that sways uncontrollably is a nightmare.  I had to take frequent "foot elevation" breaks,which slowed the process.  Adjusting from the waist is a total pain in the fanny (and the foot) but sometimes it's the only way.  Standing still while someone fits you is pure torture, with or without injuries.  We were so tired we forgot to take pictures of Rob's skirt - but you can get a glimpse of the plaid here. (And WHAT is that LOOK on my face??? You'd think I'd discovered something nasty in my tote bag!)

The Vic bodice was interesting.  I was worried that it would be too tight in the back as I'd made 3/4" seams there, but Lisa ended up taking it in even more in that area (Rats!  I'll have to take the piping out to resew that!)


The Ren corset was easy as it was only strap placement. (Except that Lisa get the right shape and I just become a cylinder cuz my ribs won't squish and there's not much room between the ribs and the hip bones )All in all, it took us 5 hours, but it had to be done in order to continue our projects. We were mentally exhausted but pleased.  And I just LOVE my pink binding on the Ren corset! (Worn here with Victorian underthings.)

Friday, June 29, 2012

Renaisance Dress


Image of the pattern cover.

I'm  changing my mind almost every day about my Ren dress. The more I look, the more I see that, unless it is a doublet, the top and skirt are the same fabric.  I had wanted to do the bodice in the same green velvet that my SO will have for his doublet, but I didn't want the heat of a velvet skirt (and it would break my heart to drag vlevet on the ground). I'd originally thought to have the bodice in green velvet and some thicker trim made of green velvet strips  going down the bodice and along the skirt front edge and the bottom, but the more I think of trying to tie Roger's green velvet in with mine, the more problematic it becomes as I look into working with velvet. It seems that cutting velvet strips and sewing them on will be a nightmare and trying to make velvet piping would probably drive me to drink.  I have enough of the clay silk to do make both a bodice and the skirt, so no worries.   So here's my new idea:  Clay dress, skirt and sleeves - find some interesting lining fabric for Spanish or hanging sleeves if I decide on that or just do the paned sleeve with bigass puff and shoulder boulder strips with puff. (Lisa tells me she's doing the shoulder roll with paned sleeves, so that option is out for me.  We-just-cannot-be-twins rule is in effect. Need to find some sort of satin ribbon to decorate with, maybe rust?  Roger's will remain the same: Green velvet doublet, velvet paned sleeves, velvet paned pumpkin pants with that orange charmeuse showing thru.  The closer I get to actually doing it, the simpler my design will become! I'm so confused.
For the fore panel, here's my inspiration:


http://www.marileecody.com/gloriana/elizabethhardwick.jpg 1590ca. Elizabeth attributed to Nicholas Hilliard (Jesus College of Oxford University)All of that design was embroidered by one of Queenie's good buddies, Bess of Hardwick on the figure on the left.  I have silk drapery fabric for the background and I'm going to use the wrong side of the fabric to boot.  I've download a bunch of Jacobean embroidery designs of birds and flowers (couldn't find any fantastical animals already digitized) and I'll start hooping soon. Just this part should take a long time and a boatload of thread! After it is embroidered, I'll cut it out and back it with canvass. I'm not making an entire skirt, just a forepanel. In the interest of temperature control, I will fore go the underskirt and just velcro the forepanel to the farthingale. Th figure on the right I like because of the pearl detailing. I don't want the huge sleeves on either examples, though. Huge shoulders, yes. Huge sleeve, not so much.

What I like about the black & white outfit  is the interesting use of trim and THE PEARLS!.  I have amassed a selection of pearls with 50% off coupons and I plan to go pearl crazy, as much as I can. I also like the sheer partlet cuz I don't like exposing my chest to the sun, but I also like the big suportasse that some ladies work and I'm not sure how to get them to play well together.  Most of the pics I've seen of costumes show the partlet open, but, historically speaking, on an older woman such as myself, the partlet would be closed. The partlet on the lady in blue is one example I'm thinking of emulating. I will NOT be making a ruff this time.  I also LOVE Bob Mackie's "joke" version.  To the modern eye it looks over-the-top, but if you look at the "bow portrait" of Elizabeth, it's not even close to over-the-top.  I'm glad I finally found a portrait using bows so I can include them on my dress somewhere! I love bows and I haven't seen them used in a lot of the costumes I've researched.  Bows on!

My pattern is from Margo Anderson's Elizabethan Lady's Wardrobe which you can find here: http://margospatterns.com/Products/ElizWrdrb.html  
I've already made the farthingale, blogged here: http://idlehandsthems-fitsworkshop.blogspot.com/2012/04/renaissance-farthingale-robin.html and am almost finished with the corset:
http://idlehandsthems-fitsworkshop.blogspot.com/2012/05/elizabethan-corset-r.html and, of course, that ridiculous bumroll!http://idlehandsthems-fitsworkshop.blogspot.com/2012/02/who-wants-to-wear-inner-tube-around.html

After spending many hours pouring over online fabric choices, I've decided that the sleeves will be lined in the velvet that I already have for Roger's doublet and pants. I also started the machine embroidery for the fore panel.  This is a lot harder than I thought and will be very expensive. I did wait for a 50% off thread sale at Joannes, but these designs will take a lot of thread! I bought my designs at emblibrary.com.  One of the problems I've encountered is that, depending on what printer you use will give you a different result on the colors that print out. I tried to use the Thread Exchange on their site, but trying to actually BUY a specific thread color is ridiculous. I will just make do with what I've already got. Add to that the fact that I can hardly tell which design is which once it makes it from the embroidery card to my machine and that makes for all sorts of problems. I thought I could just start it and let it stitch while I sewed other parts, but I keep having problems.  Last night, right in the middle of a design, I developed massive thread nests and had to stop mid-design and take the machine apart. Sheesh! I've re-hooped, changed needles, changed tension (resulting in a nest of thread, thank you) and all this after stitching a perfect test pattern. Argghhh! This is going to take forever. Here's a pic of what I've done so far:

Thursday, June 14, 2012

Short Sewing Sunday

We've been quiet, but busy.  We each have multiple projects in motion at once, and at various stages of completion.  This last Sunday, we got together to do fittings.  We thought we might squeeze in some actual sewing, but fitting took precedence since that's one thing we can't do on our own.  It's a shame, really, since sewing underthings like petticoats is generally boring, and waaay more fun to do in company.

Lisa fit her renaissance corset for the final time, and Robin reset the back strap placement so the straps stay on.  All that's left is closing the boning channels and binding the top.  Lisa also fit her 1840's bodice (a couple of times) and determined the hem of her multi-layer petticoat (which means she also knows how long to make her skirt).

Robin fit her 1840's bodice and a ballgown bodice.  She also got to try out her new corset.  PRETTY!

But first, a quick science picture!

Did you get a chance to see the Venus Transit?  We did our best with a telescope lens and a magnifying glass (the image is projected on a blue shopping bag).  See the faint circle in the upper right quadrant of the picture?  We're pretty sure that was Venus (black dot inside the circle).  thanks Greg!

So we will try to take more pictures soon.  And really, how many pictures can you expect from an afternoon of corset and bodice fittings?  We were really busy and often fairly naked.

And if you haven't been following recently, here's what we've been up to:
Men's Frock Coat

Yoked Petticoat - 1840's
Elizabethan Corset
(scroll to the end of the post for the most recent updates)

We will start posting on our 1840's dresses soon.  They are still mostly just ideas.

Wednesday, May 23, 2012

Sewing Eclipse -

What a long day it was!  We started strong and knocked down a few quick things.  We fit the muslin for the 1912 project skirt.  Quick and easy.  We made decisions on buttons and button placement on the frock coat Lisa is making for her SO.  We looked at fabrics for Dickens era day dresses and talked trims.  Some decisions were made.  We reviewed design ideas for a multi-layered petticoat attached to a single yoke (provides volume without adding bulk at the waist).

And then we got back to work on our corsets.  The goal was to baste on a lacing strip and do final fittings.  First problem...Robin forgot the lacing strip.  She gets a pass since she is handicapped for the moment and must rely on her SO to load the car, so sometimes things get left out.  We made one ourselves from some stray canvas and grommets.  The scrapped together lacing strip did tough duty all day long.  The corsets were too big.  We had already done modifications and the result was that both of our corsets were too 'tall' at the center back.  We had to trim that part.  Robin chose to take hers in at the side seam.  She talked Lisa into it too.  Lisa probably should have cut from the center back AND taking in the side seams, but....whatever....  They're done, trimmed and grommeted.  Time to start binding.

Our best break was a brief stop to watch the eclipse.  My SO got the image refracted onto a dark surface.  Yup, the sun's corona blasting around the shadow of the moon.


We;re gonna try something new.  We are going to post each garment and update that post when we make changes.  Then we'll post a collective update as needed.

The updates on the corset are under the post Elizabethan Corset
(we were just so tired of them...seriously sick of looking at them, lacing them, re-stitching them)

Frock Coat will be up soon under WWND

Dickens yoked petticoat us at Sally Petticoat

VPLL 1912 Skirt posted shortly under that title


After a day in a house with cats, Rob finally succumbs to allergy tears

Wednesday, May 16, 2012

The Elizabethan Corset - R


After spending an entire sewing session fitting our corset muslins, we cut them out and sewed them together.  I finally received my flat steel boning and could check the channels and rough cut them. Lisa is using the same fabric, but plastic boning she got on sale.  Here's my corset with a linen front and a coutil back with the bones rough cut and shaped on one end. I'll cut and shape about 6 more for the back, even though, until we have our fittings again this Sunday, I won't know how many I'll really need.  I must dip the ends in paint to seal them.  I hand filed the ends because the Dremmel was in the garage and the garage is not a friendly place to a person on crutches! Now my hands are sore.

Come Sewing Sunday, both of us have our basic corset with boning in the front and sides.  The PLAN is to baste on a lacing strip and do a final fitting.  Except the lacing strip has gone missing again.  So we make our own from some stray canvas and grommets.  Then we fit, and fit and fit. ( It didn't help that we had slightly uneven grommet placements on our fitting lacing tape - R) The first picture of Rob's fitting was lost, but here is the second....and it is obvious that we don't have an even 2 to 4 inch gap down the center of the back.  (the first go had the top two grommets meeting at the center).  So Robin had to go in and make a curve out where her ribs are more robust than most!  Guess that's what comes of going corset-less for most of your life!  After that adjustment, we got it pretty darned correct.  By the time we were finished fitting, our combined patience had worn thin and I actually yelled Lisa's pat phrase of "It's only UNDERWEAR!" - R

And now it's time for grommets.  I (Lisa) had never done this before so Robin made me do all my own marking and measuring.  Also I got to do my own hole-spreading and hammering.  And that sits well with my Viking heritage!

Here is my marked line with the grommets already in.  I guess it's hard to see the marking for actual grommet placement.  Sorry!  And here I am, carefully creating holes with an awl (reduces broken threads in the fabric for a stronger garment) and hammering in my grommets.  I'm always happy to hammer something! Look at her pretty grommets. Yeah, I make her do her own yet I'm the one who ends up putting one in backwards!  Sheesh! - R


We've already stitched up the bottom edge of our boning channels so the lower part of the corset is done except for binding.  We still need to fiddle with the strap placement.  It's just not right.
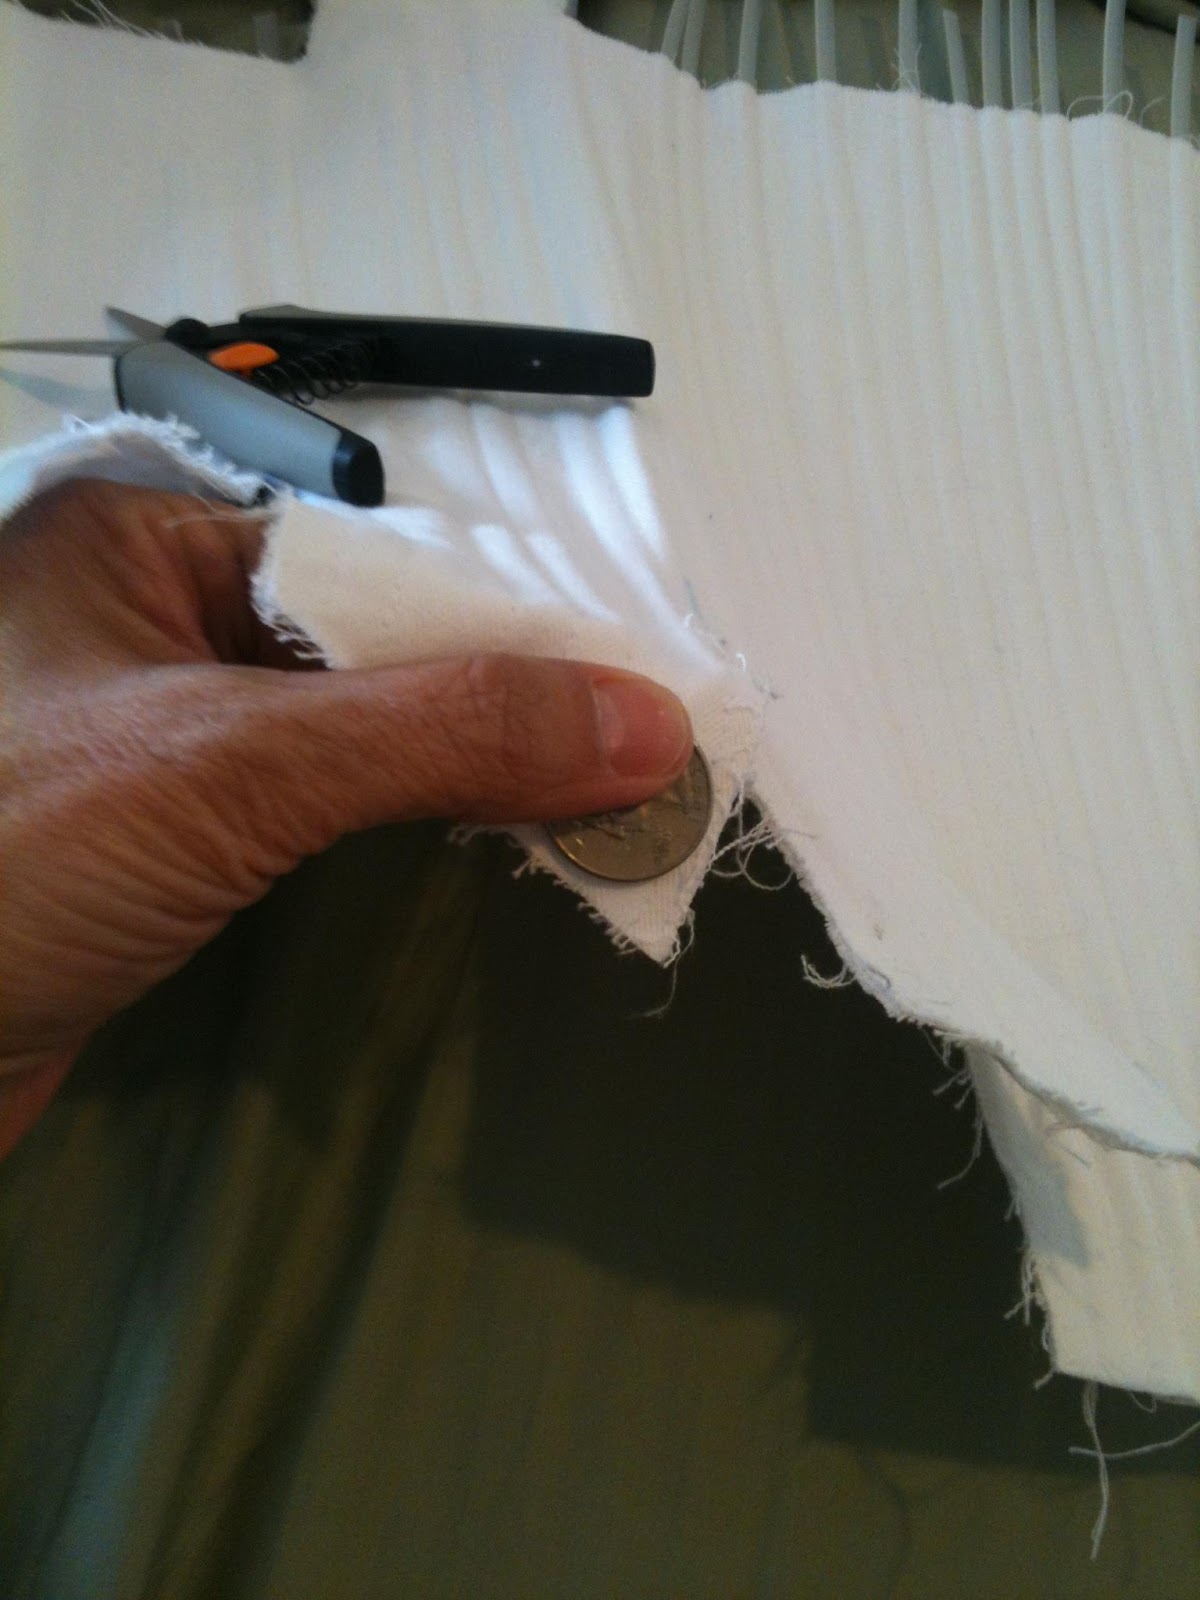
But, being impatient I have started binding the bottom edge.  And the first step is to round the corners of the tabs.  The instructions suggest using a quarter to mark the curve.  Works perfect.  


And then, simply sew on the binding.  HA HA HA HA


There is very little simple about sewing on binding around curves. Here is an 'outside' curve where it is important to spread ease over the whole inside edge of the curve.  Those bumps will go away with pressing (which I can't do because I got taco on my corset  : O ) (And Rob just HAS to chime in with "WHY are you working in white with taco sauce anywhere near it????!!!  But your stitching looks fab.  To which I reply - it was dinner time!  )


We've finished binding the back and bottom of the corsets.  Next it's time for a wash and a final check to make sure the top hits at the right spot.  Robin re-set my back straps.  I have a full bust but narrow shoulders.  Always a fitting challenge.
Here is a close up of the back, washed and ready for bones.  In fact I've got the bones in, trimmed, filed and the top sewn shut.  Ready for the final binding.  I'm taking it on vacation with my for hand sewing.  I like how it looks.

I don't plan to send updates from my secret Southern California vacation spot (he he).  But ya never know.....
(OK, OK, I might be the chubby lady under the umbrella, by the pool, sewing)


I've joined the ranks of "those who get "stuff" on their projects. I KNOW how the blood got on the bias trim, but what IS that orange stuff that looks like Cheez-it orange? I have no idea.  Really. I was going to wait for my strap fitting to finish the binding, but decided to bind as much of the corset top as I could, leaving room to position the straps.  We'll be doing a strap fitting for me plus a measurement for the Ren bodice pattern. I had measured Lisa in her corset and chemise and she says that the measurements didn't really help her for the bodice, so she just cut a muslin with extra fitting room. Maybe I'll end up doing the same, but part of me feels that measurement must be good for SOMETHING, right?

Addendum:  That wasn't blood on the corset.  The culprit has been found out.  It is residue from my lightly tinted lip balm going from pin-in-mouth to pin-in-corset, leaving a dot of pink at each pierce point. ARGGGGHHHH! Almost finished with the had stitching of the bias tape and sewing through coutil is a be-atch. Glad it will be over soon.
 

Monday, April 23, 2012

Success! A little bit at a time

We had a Sewing Day yesterday.  Our plan was to work on Elizabethan corsets.  We also had some odds and ends that needed both brains.  It was a resounding success.  Corsets are hard.  Especially if you are not already thin and firm.  The goal of a corset is to nudge your shape into the 'fashionable' form of the relevant period.  In order for your 'out' to 'fit' you need the inner 'you' to be shoved into shape.  In this case, it's Elizabethan.  We have most of our underthings made, but cannot progress on finishing until we know what our corseted shapes will be.  In addition, we can't move on to our dresses for the same reason.

In my case (Lisa), not only am I bigger than average, I'm also much squishier.  This makes it difficult to know if the pinned corset is actually correct.  In fact pinning the corset on me is quite a chore.  Robin is a bit easier, but it's still not easy.  Aside from basic fit, there's also a lot of decisions around what kind of fabric to use, and how many layers.  We each made a muslin for fitting.  Muslin stretches.  Once we each got a muslin that fit, after at least three iterations, we needed to use the muslin as a pattern to make sure that we accounted for stretching.  We also wanted to keep the layers to a minimum.  We expect to wear these costumes in very warm weather.  We ended up with coutil and linen.  It feels amazing.  The picture at top is Lisa's corset, with both layers cut and the first bone in it's channel.  That's what we wanted to accomplish, and we did.
Here are a couple fitting pictures to illustrate the challenges of fitting:
In the top picture the fit looks like a traditional corset fit.  WRONG.  The instruction clearly state that there should be a 2 to 4 inch gap of the same width all the way down the back.  Do-over!  the lower picture shows a 2.5 inch gap all the way down.  This is the correct fit.  It also demonstrates how hard it is to pin correctly.  As soon as I let go to take the picture, the back slid down, distorting the view.  Also, if I didn't pin very closely, there were nasty pulls that made the the fit look wrong even though it was actually really good.