Wednesday, March 18, 2015

Outlander - L (final)

Let's face it, who hasn't watched Outlander and wanted to make a costume?  It's winter, it's raining, and plaid!  With knitted stuff!  I've seen posts about Outlander costumes all over the place, and I want one too.  And yet, it's another 'Lord of the Rings' moment for me.  So many Claire costumes, and all done by lovely girls.  Fragile and delicate in their yards of plaid skirts.  If I looked like that, I would be wearing it.  Right now.  Being me, though, I had two problems:  I would look like fairly-tale giant in those dresses, AND I sorta like the guys clothes better.  In a fit of early morning inspiration (or a profound lack of coffee) I decided that I wanted to make something inspired by the guys, and that their clothes reminded me of mid-teens ladies wear.  I have a whole Pinterest board of images but here are my favorite inspiration pictures.

This blouse, in white (and not shiny)
Girl in the Plaid Skirt.


I have been informed, by more than one person, that this will be the most obscure costume EVER.  No one will get it.  La la la la....not listening.  This is one of those costumes I'm making because I just really want to make it.

I started with the knitting.  Gave me time to think about the other stuff.  These are from free patterns on Ravelry and very easy.  Mitts and a beret.  Because it ain't an Outlander costume without knitted stuff.

I burned some stash yarn I had laying around.  I buy yarn because I like it and it's on sale and never have plans to make anything with it.  This is a much lighter weight yarn than the patterns called for but the result is soft and not warm.  Which is really good because here on the California coast I rarely get cold.


The Skirt
Initially I wanted to make a hobble skirt, but they were long out of fashion during the beginning of WW1.  And hobble skirts and pleats sounds pretty nightmarish.  From 1915 to 1918 skirts tended to be mid calf and full near the hem.  I spent hours looking at plaid fabrics online.  There were lovely wools that would break the bank (or at least destroy my travel budget).  There were decent medium weight cotton options but I didn't like the colors.  And there there was heavy cotton flannel.  Possibly the worst fabric choice I could make, but exactly the plaid I wanted.  So I picked the wrong fabric!

Because of the thickness, I had to forego a hem in order to get the pleating right.  Luckily the fabric is heavy and the selvedge wasn't weird.  Then I spent hours and two boxes of pins pleating it.  I left a smooth panel in front and a smaller smooth panel in back.  All the pleats fold toward the back.  I used my widest hip measurement while sitting for the skirt width.  And then I vinegar pressed the pleats.


I'm sure no one is surprised that even vinegar pressing will not hold a pleat in cotton flannel.  At this point I wrapped this big, pin covered piece of fabric around me and determined where I wanted the hem and where I wanted the pleats to start being stitched down.  Then I sewed a tiny seam along all the folds to hold them in place.  From the hip to the waist, I wanted the pleats stitched down.  But first I needed to cheat them in to match my hip curve and end up matching my waist measurement.  That required patience and math.  Then it was just a waistband, hook closure, working buttons on the left and decorative buttons on the right.  I made two sets of buttons (top and bottom) to channel the mid-teens look.


Blouse
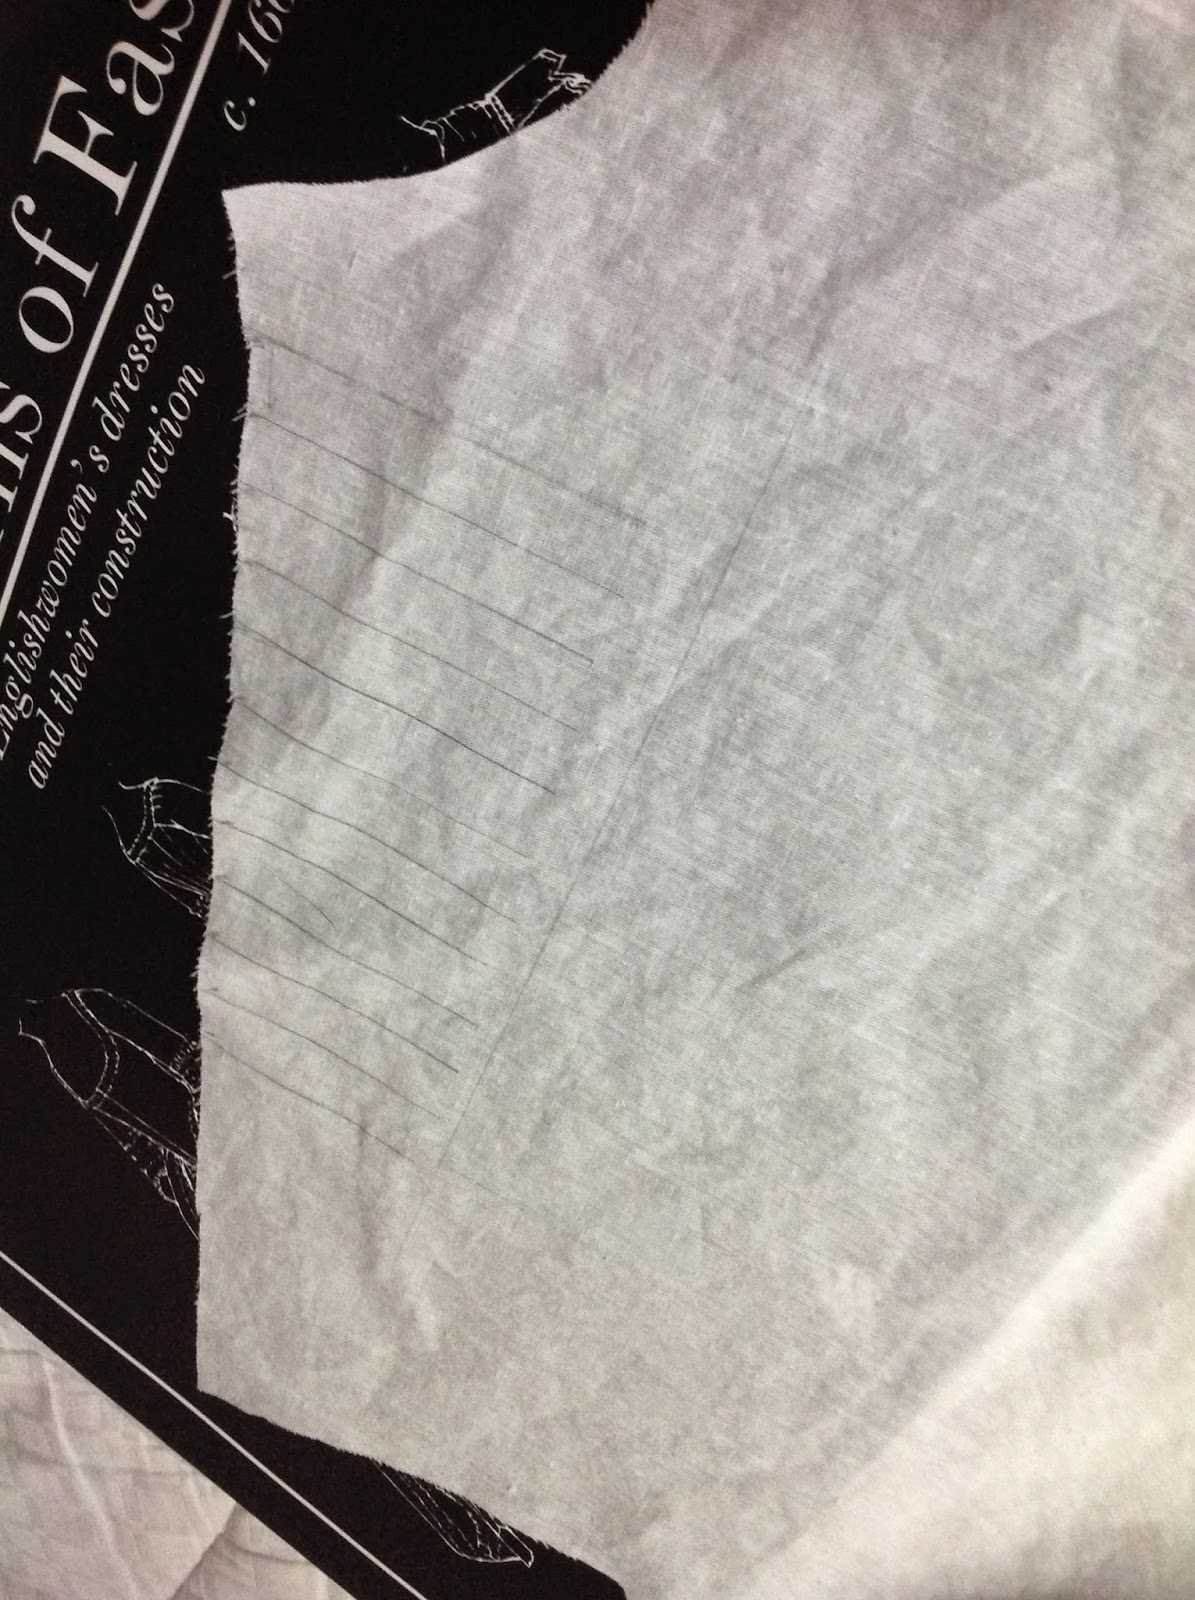
Most every blouse I looked at for this period has a sort of sailor collar.  But I don't want a sailor collar.  I also don't want a high closed collar because they are kind of claustrophobic.  I decided on a high, two piece collar and I would add a button in jabot.  I use this Kwik Sew pattern a lot.  It lies.  It is not quick.  Two part collar, yoke, and lots of topstitching.  I use it for it's parts because then I don't have to draft them.  This time, I added bust fullness at the shoulder and made pleats which requires more math than it seems like it should.  I also added about half an inch to the collar stand and the collar.  I made the sleeves longer and fuller and made up a cuff.  To control the fulness at the waist, I made top-stitched inverted box pleats in the front and back.  This means my shirt won't have ugly bunching and re-arranging while I'm wearing it.
front waist box pleats
pleating lines
top of nearly finished blouse


Next up was a jabot.  It seemed like a good compromise between the wrapped cravats from Outlander and lacy Edwardian neck decorations.  I looked at jabot patterns online and drew a picture of my estimate in 'real' size.  It took a few tries to get it right (using scrap paper for the test).  It's a simple Fibonacci curve that I tried to draw free hand.  Picture proof that my drawing skills are wretched.  I just kept trimming at the paper until I got it looking the way I wanted.  Then I cut fabric and hand hemmed it so the curves would lie nicely.


Made a little rectangle collar piece and added buttonholes at the ends (not shown).


I added buttons to match on the collar stand so I could button it in, or use the jabot on other blouses in the future.  The rest of this blouse was buttonholes and buttons.  Interminable.  But also pretty much exactly what I wanted.


Selvedge fringe
Jacket - I used a modern jacket pattern as a base.  It's 2 or 3 sizes too small for me except for the back shoulders so it was interesting.  I had to make it longer, fuller, add big cuffs, and add actual pockets rather than decorative flaps.  I used the fabric selvedge around the pocket and cuff edges for texture.  I didn't take a lot of pictures during construction because anything that could be a problem WAS a problem.   Nothing big, but everything was a fussy, time sucking annoyance.  The worst part was the decorative waistband that just didn't want to lay down and play nice.  In retrospect, I should not have laid the waistband over the gathered front.  I should have made the front into two pieces.  Now that it's done, I still don't really love it.  If I have time, I plan to do the waistband one more time.  And finally get it right.


Purse/Sporran - My final accessory!  I made a purse with a chain handle OR the handle can live inside and there are belt loops on the back.  I can hang it from a belt like a sporran.  I used very cheap fun fur that I had left over from a kid's costume.  I ran uneven gathering up the back of the fabric to mimic sewn pelts.  On close examination it looks like cheap fun fur.  From a distance it's not that bad.  Really.

You may be asking 'but where's the vest?' because the Outlander guys wear a lot of waistcoats.  I made one.  I didn't like it at all.  It didn't seems to fit with the WW1 look of the outfit and it didn't resonate with the look of the guys in the TV show.  The vest is on an extended time out.


All 19-teens, out for a walk
Results  -  I had to do the photos myself with a tripod and a timer which was a bit of a struggle.  All the blouse detail got blown out in the exposure.  I've added a couple pictures of the blouse that highlight the pleating and cuffs and jabot.

Golf balls 'cause Scotland!

I will kill at tennis


The pose in these blouse pictures is deviously designed to hide the fact that I'd just rolled outta bed, slapped on some eye make-up and was trying to hide a hangover.  I really can't drink.  Be kind.


remember...these guys

Monday, March 16, 2015

Sewing Day - L (and R)

We just had a sewing day and got a LOT of stuff done.  We save up our fittings for sewing days so we can do lots of actual sewing in between.  For Robin, we fit a 30's dress.  Backwards.  This explains why it was too long in front and shockingly low cut.  Turns out, it fit just fine.  We also re-fit a 20's dress.  Robin had lost a bunch of weight and it was getting baggy.  No pictures were taken.  Sad face.

For me, we re-fit the 18C court dress only to realize that I'd let her lace me REALLY TIGHT the first time.  So now it's too small.  Good news, it's only too small over the front.  I can slash and spread from just past the robings up to the shoulder (outside of the dart) and all will be well.  We also determined how much fabric I need for a petticoat.  I will put a 3 inch hem at the bottom, more for the support of extra fabric then that we were too stoopid to pull it up higher.  I can to the pleats and draping over the hoops on my dress form now that I know how it's supposed to be.
My dress form is a glorified hanger.  Not my shape at all.  


We also fit my Lowell Mill 1830's bodice.  As typical, it was too big in the back, the darts were too high and I had scats of extra fabric above the bust.  We darted it, and I will re-cut the front shifting the top darts into the under bust darts.  I also need to lower the dart points a little.

I am really happy with my Regency/transitional stays now that I've removed the busk and replaced it with flat steel.  Same basic silhouette without the visible stick under the bust.


Finally, we played around with decorating the back of my nereid hat.


Monday, March 9, 2015

Mill Farm Robe a la Francaise plus an update and lots of pictures- L

Dear Pattern, can we talk?  You are not holding up your end of the bargain.  I'm glad you weren't terribly expensive because you have no pictures.  Just words.  And your words are nothing like the words I would choose to describe specific actions.  I'm thinking I need to re-watch this week's Downton Abbey because I spent the entire episode trying to figure out what you meant by pleat at AA and BB. That said, your shapes seem to work quite well once I change them for my bust.  And that is a separate rant.  There are no tutorials for doing a full bust adjustment with a shoulder pleat.  So here is a picture of my best guess.


Updates to this dress are now in a new post here

 And here is the first fitting.  Not half bad.  Too long in the waist and a few more tweaks.  I have already cut a new, improved version that I will fit very soon.  Due to the FBA at the shoulder, I have way too much width there.  Luckily, I can just cut it off.  That thing that looks like a cape coming off my shoulder is the body of the dart.  It's pretty darned big.


And in the mean time, I finished the beaded octopus for the nereid corset.  The colors look very dull in the picture.  I included a picture of the back.  And I did make two of them.  It has exhausted my desire to bead anything.


AND FINALLY
 I dragged my gimpy self out of bed and took WW1 Outlander pictures.  I was hoping for a foggy morning.  And hoping I could find my son's old kid sized golf club.  I had to settle for holding balls (yes, I went there) and a vintage tennis racquet.


Saturday, March 7, 2015

The VERY full plate - L

Trapped in bed, working on cosplay and Nereid hat
I've made an error.  I decided to have ALL THE FUN at once.  So here's what I'm working on:

WW1/Outlander cosplay is done except for pictures.  I have to 'do' my hair to take pictures.  It doesn't take long but I also want to do pictures on a foggy morning.  Atmosphere.  I want this done by the end of March.  Blog post.  (updates are near the end of the post)

Nereid - Skirt and corset mostly done.  I need to choose the right petticoat for the skirt and sew the beading on the corset.  Which means I need to finish the beading.  I made a tiara and seaweed.  I need Robin's help to put it all together.  And I made a start on the shoulder armor.  I want this done by the end of March.  Tick, tick, tick....  Blog post.   (updates are near the end of the post)

Lowell Mill dress - I made a muslin and am ready to fit it.  Then I twisted my ankle and missed our sewing/fitting day.  I couldn't stand up on one leg for very long.  And I can't lace that stupid corset by myself.  Also, I wore the corset to a Regency dance with my pretty blue Regency dress that I never properly blogged.  The busk is bad news.  I have boobs and a tummy.  The busk was flat against my chest but was pushed out by my belly so it stuck out at the under bust.  Nothing is cuter than a clearly visible wooden stick up the front of your body!  I took it out and replaced it with flat steel boning.  That should work a lot better.  I will take a picture next Wednesday when we finally get to out fitting party.  Once the bodice muslin is fit, this project should be pretty quick.  It's not complicated.  It should be finished in June.  Updated blog post soon.

18C Demode Court dress - first fitting is done!  And I had to recut it.  The second version is ready to fit.  I also need help to made the under petticoat.  It has to go around my giant pocket hoops and pleat at the top.  Once I get THAT figured out, I can use it to cut the visible petticoat.  And let's just not talk about the wig.  I just can't think about that right now.  Needs to be done for Costume College, end of July.  First post going up soon.

Naruto cosplay for Fanime - I have my son's Kakashi shirt and pants pretty much done except for trim.  I have the wig and headband ready for styling.  I still need to work on bracers, leggings and shoes.  And make a mask.  I have never styled a wig.  Going right for anime hair first time out.  Wish me luck.  And I'm doing a costume for me too (Jiraiya).  The wig is here, and most the fabric arrives Monday.  Finally, I'll need to help my daughter with her Tsunade costume.  Needs to be done mid-May for Fanime.

I'm all into the Historical Sew Fortnightly (now monthly) so I'm distracted by that.

Finally, the kid's improve group just reached out for costume help.  The play is on Monther's Day.

This may sound like a lot, or it may sound like I'm whiny.  But I'm stuck in bed resting my foot so it heals really quickly.  I'm going to Paris and Morocco for a dance and music tour in 2 1/2 weeks.  And I'm leaving in a month.  I think the kids are gonna get short shrift.

Friday, February 27, 2015

HSF 2 - the Blue Challenge

All three blue things, standing together.
Nothing challenging about blue!  In fact, I did 3.  And yet, here I am on the second to the last day, not quite sure what to post.  Yup.  I did 3 blue things this month.  All of them part of other things that are 'in progress'.  So I'll be posting them again as part of the final update for each outfit.

The winner is the 1915 plaid pleated skirt.  Why?  Because it's the 'Historical' Sew Monthly.  And plaid and pleated skirts were very popular in/around that time.
This is part of a cosplay and that post will be updated very, very soon

 Runner up - the 'blue demon' skirt.  It is the skirt for my nereid, and it's supposed to be water.  The skirt, when worn with a petticoat, is inspired by Victorian natural form.  I considered using it, but polyester organza and a 3 layer fishing line hem aren't really within the guidelines.  I'd love to say this was fun to drape but I would be lying.  Polyester organza is everything that is evil.  It IS awfully fun to wear though.  I am readying an update to the nereid post very soon.  In fact, I'm making seaweed right now and then I'll get to it.
Second runner up - Regency shawl, hand woven with twisted fringe.  Perfect!  Historical, and very pretty.  But only 6 feet long and 12 inches wide so it needs to be longer (which I can't do) and/or wider.  I may be able to make it wider.  Maybe for a later challenge.  It will get it's own post soon.   Until then it is a relatively useless scarf.

I've been busy making things and taking pictures.  As soon as I hit my next major roadblock (probably on Sunday), I will update posts all over this blog!

Saturday, January 31, 2015

Update on Robin's First "A Gatsby Summer Afternoon" dress

Roger and I at a subsequent 4th of July Picnic, before the dress fell apart


Gatsby has come and gone, but Lisa is forcing me to post. As readers may recall, my first attempt at a rereleased Simplicity pattern from that era ended up in the muslin trash heap as a total disaster. So it was back to pattern shopping. I ended up with Reconstructing History's 1930s Ladies' Day Frock with Jacket #1317 and 1930's Ladies Princess seamed Slip which you can look at here: http://store.reconstructinghistory.com/rh1317-1930s-day-dress-and-jacket.html.  The site won't let me copy a picture from it.
I added an inch to the hips and all went well with this one. Some sewing techniques, like folding under the seam allowance and top stitching it down, were new to me but easily done once my modern brain got over it. The pattern has one omission in that it did not have an opening in the back neck, although the picture showed it.  I just put one in.  Lisa draped a better jabot for me (Thanks, Lisa) and that was that. Lisa also decorated my hat with stuff we bought in the Los Angeles fabric district when we were on a Costume College Shopping Safari. That stuff on the hat is actually a crinoline strip!
Here's the final product.  This dress fits me better than anything I've ever made. Oh, and the shoes are from American Duchess.  You can't see them, but they are great.  Love her shoes. The gloves I found on a trip to Europe in a fabulous glove shop that Roger spotted (He's good that way).
Post script to the post - the first time I had washed the dress, the seams started coming apart, even though I finished each edge. The dress is now unwearable and I am sad. I made a new Gatsby dress but it is so ugly I can't bring myself to write about it yet, let alone put up a picture. Oh, well.....C'est la vie!

Regency Dance Dress and Turban Finally Finished! - Robin

 Here's the final product of my first Regency foray. After making the stays and the dress last year, I had yet to finish the closings and the hat. Such a procrastinator! But as we have a Regency Ball coming up at the end of February, I got myself in gear and finished.

The dress is from Simplicity Costumes 4055, unmodified except for fit. The back is not historically accurate as I was only interested in getting something together to dance in. I ended up with too much back and overlapped it with double buttons.  Originally I had used hooks and eyes, but they popped open the minute I moved. The bow closes with hook and eye so it will hang correctly while dancing.

Now that my hair is l-o-o-ng, I really don't want to style it because all the curls will fall out the minute I sweat, so a turban was the answer.  But which one?? The answer came from a Costume College class Lisa took - Easy Regency Turban. However, mine was NOT that easy.  Here's why......
The back of the non-historic dress
The not-so-easy Regency Turban

starting the weave
the body of the hat
laying out the stripes
 I made the material for the turban out of ribbon bonded on to Pellon. The stuff I had was a bit stiff but I did it anyway. For the band,  I did it in stripes and machine embroidered the edge lines.  For the body of the turban, I wove the ribbon into a plaid that Lisa called "Sort of a Space Invader Plaid". This was a technique I saw in Threads Magazine a while ago and had wanted to try on something.  Evidently this should NOT have been the project to try it on.  This turban is supposed to be soft, malleable.  Mine is decidedly NOT. At first, all I could think of was "OMG, I look like a deranged Baker!", but as I sewed on the feathers and the jewel (from a hair scrunchie), I began to feel kinder towards it.  I will get some fake hair to make into tendrils to attach to the inside of the hat to frame my face, but as of now, it is wearable.  And by the way, the dog did not eat the pattern until after I had finished the turban. C'est la vie!


embroidery on the stripes